How do you dial back the extrusion steps in the firmware.?
Stepper burned out
I haven’t done that yet, just reducing the extrusion multiplier in Simplify3d is doing the job for me for now.
I have made a new discovery that i can now mount 2 clones side by side just waiting for them to arrive.
the brass part is a extender not a taper thread adapter but it looks like your clones dont need it.
the ones i ordered were for the monoprice mini and are shorter.
As for the stepper gear you can use a bottom stepper with the gear pushed further down the shaft but i like the bigger gear just need to slow the extrusion down atad more than what octoprint will let me
I think in slic3r i can set the range no limits.
wouldn’t you be able to calibrate using the usual gcode and pronterface while its connected to a pc via usb?
Tell me how. I. Am stuck no mater how i change my e steps it still feeds the same amount
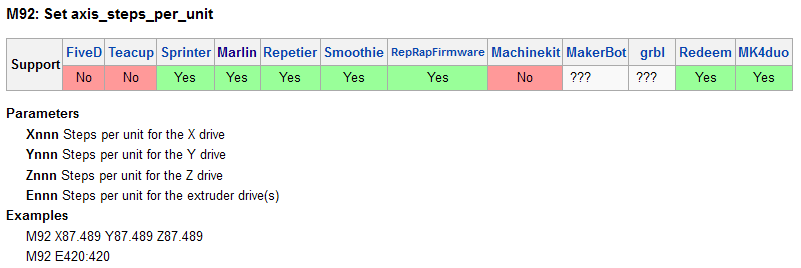
Easiest way to change the Steps per unit is to install the Marlin-EEPROM-Editor-plugin in octoprint. Jusi install it via the plugin installer included in octoprint.
Then, goto Settings --> Marlin EEPROM Editor --> Read EEPROM --> type the new values into the fields --> write EEPROM.
Works even in mid-print, although I would not recommend it…
Another way would be to set a command M92 into your gcode startup script in Octoprint:
setings --> gcode scrips --> when printer connected:
source
The third way is, to save the parameter from the M92 command into eeprom with “M500 M92 E200” (for 200 steps for example) --> that is exactly what the EEPROM editor does in background.
Thank you will give it a go
so was the m500 command not working? that is the one that is supposed to save the new m92 setting to the eeprom
I tried the marlin editor it worked first time extrusion spot on in fact. 100mm was 100mm with no bits left over
Thanks for the tip it made it so easy
I am more a mechanical guy than
software.
Its printing at the moment and looks way better
Hi @dgbrit. It’s good that everything is coming along nicely. Is there enough room for to fit (2) E3d’s next to each other?
Also have you tried printing in nylon yet? I’m pretty sure the e3d can handle the temperature.
Yes I have 2 on mine will post pics tomorrow. But now I know how to do it easier than the way I did mine
I am expecting.the all metal hot ends tomorrow the longer ones.
I think they can handle 300deg
> type or paste code here
```<img src="/uploads/default/original/1X/6a1312188358a49b411d6d44e78d962a4e000896.jpg" width="312" height="500"><img src="/uploads/default/original/1X/dd88c869f3a04c7a152bc23de33ffccba024fd32.jpg" width="312" height="500">I like it like this until I can figure out how to mount the fans directly to the modified e3dv6 . I am still using the Zim fans as they mount as they were originally made.
Can you tell me what kid or recommend what helicoils I should buy to do the mod you mentioned earlier in the thread? I’m not too familiar with the helicoil, so I’m not understanding how to tell if the outside diameter is 8mm.
One more question… How do you deal with the bent end of the helicoil used to drive it in? How does the tube go past it?
Just place the tip of a screwdriver on it and hit the end it will break off
A 6mm helicoil has a outside dia of 8mm so the tap you use is 8mm
You don’t need the full kit just the coils. Just screw them in with a flat blade screwdriver and break off the tang or you can just screw that heater tube in and it will break of
There is enough room for 2 coils one on top of the other
That’s Not right. The 8mm thread has a pitch of 1.25mm per revolution, the 6mm thread has 1.00mm. The cutters that come with the kit do have the right pitch and diameter for the coil, so in fact, the helicoil cutter is a M7.9 x 1.00mm.
DO NOT USE a standard M8! The attempt will fail.
Good to know, thank you! I saw later in the thread you’ve tried other things. Did you find the original configuration with the jam nuts and the stock heatsink and fan blowing on the heatsink worked? My biggest concern is heat creep, so I’m working on fan 40mm fan mounts to fit over the nema 17 mounting patterns on the sides.
I’m glad I bought the full kit with the tap!

