
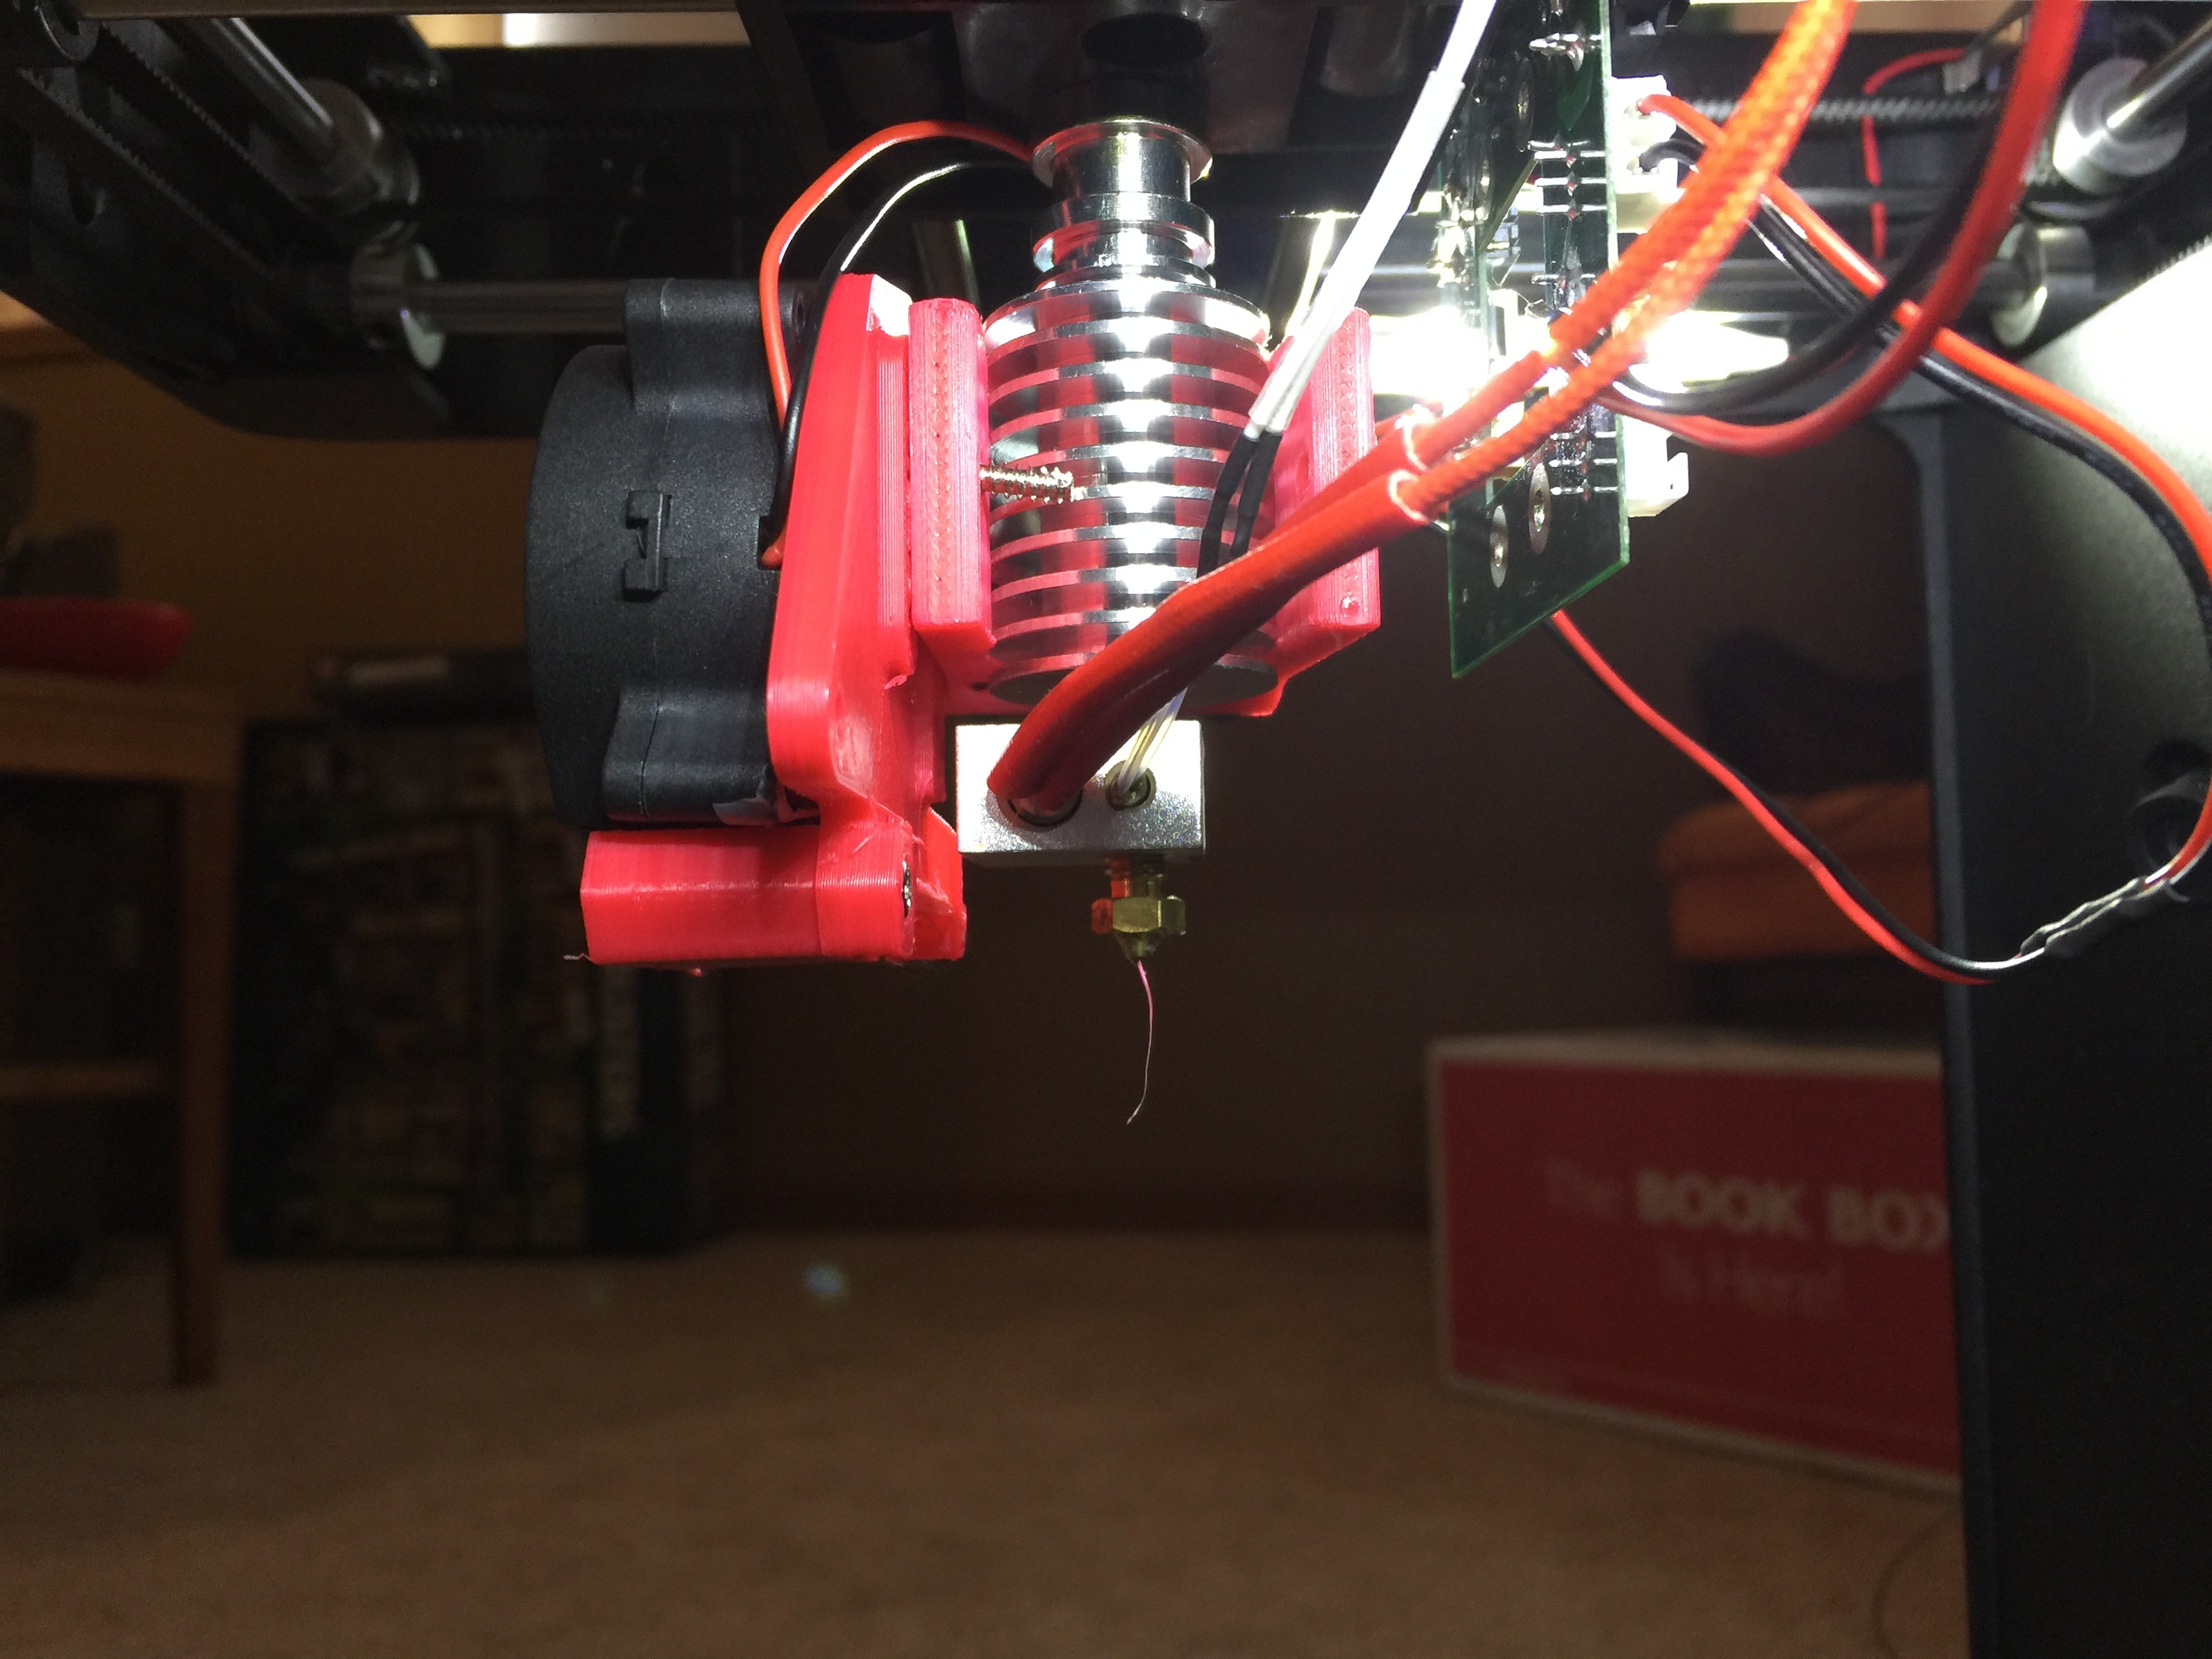
Nice solution here, for the fan/s, hot ends and thermisters are you bypassing the circuit board and splicing right into the ribbon cable? If so do you think you do some sort of diagram of what wires splice into where on the ribbon cable? From your one write up and pictures its clear that the outer 4 wires on each side are for the extruders. Thanks again for posting this!
Stepper burned out
I still connect to the circuit board but eliminated the plugs and soldered directly to the back of it as I was getting erratic temperature signals. That fixed it
Still plug the fans in original. Sockets
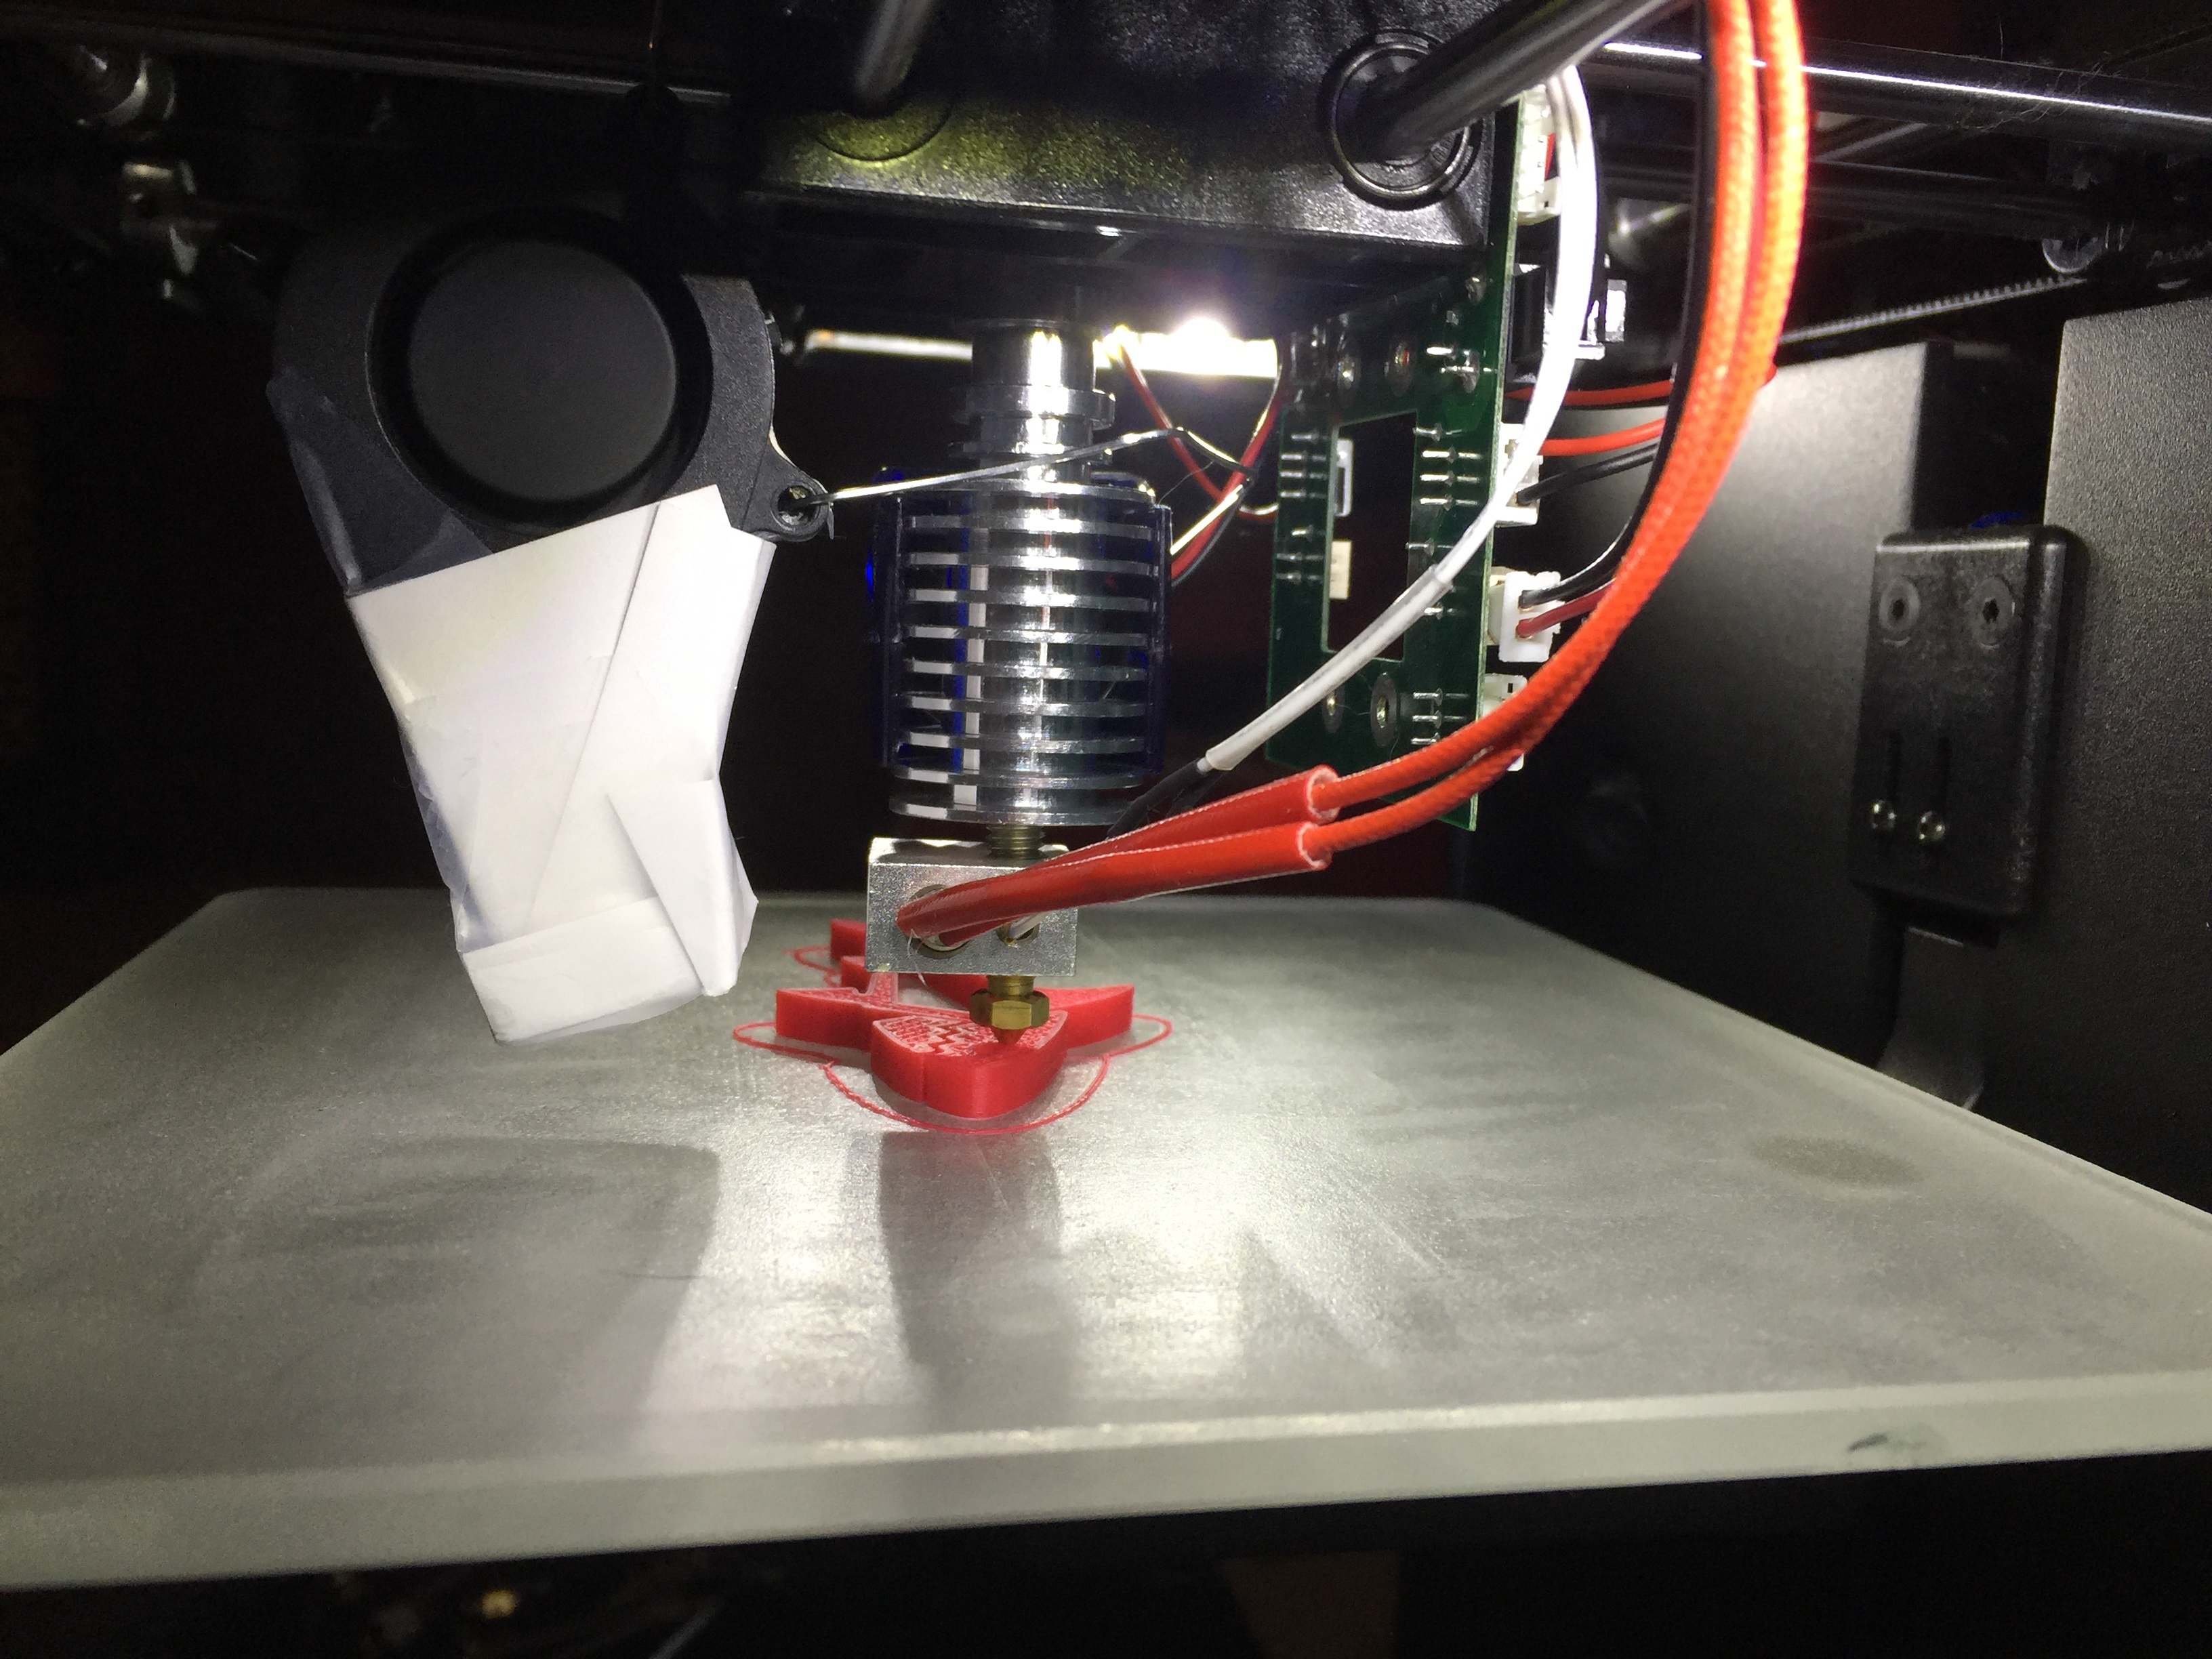
Not pretty but it works!
1 Like

Hi Call what slicer are you using?
I just tried slic3r and it wasnt all that gteat
I was using curia and it was good but there were. A lot of people said its better.
Hi,
I use Simplify3d nowadays for most of my Zim prints. I was using Slic3r but moved to Simplify3d when I made the move to Octiprint via a Raspberry Pi. I have had really good luck with this setup.
One thing I had to do with this bowden style setup is to reduce the extrusion multiplier. Replacing the direct feeds with the bowden style works but alters things quite a bit. I really need to go back and adjust the extrusion steps in the firmware but for now just dialing things down in Simplify3d really helps.
You also need to play with your retraction settings too. All in all I like this setup compared to my other Zims, being able to leverage a lot of open source parts will keep this thing running a bit longer. This was a “dead” parts machine so thanks for starting this post. I had a similar idea to this one a while back but never had the motivation to do it until now.
I was reading some of my early posts and the spell checker was having a ball .Hopefully you can make sense out of the garbage.
Its been about a week now and not one problem except for a couple of tries with slic3r instead of cura. It seems something wasnt set right but i changed the filament to pla at the same time.
Totally broke my rule of only changing one thing at a time. But do it all the time lol
I did dial back the amount of filament that is extruded on the slider in octopi to around 65-70% as the nozzle is bigger this can be done on the fly just as adjusting the temp while printing.
The heated bed arrived but i didnt realize i need another power supply and relays to get it going or maybe just leave it as is cos it works fine.
By the way Cal it looks like your e3dv6 is longer than mine (no pun) i wondered how you got it close too the bed with no modification mine was about 15mm shy plus the heatbreak tube was 7mm in the heatsink and 6mm into the heatblock
I did order a couple more different heatblocks with 6mm internal threads
I always double up on my orders sometimes just to have a spare but this time it was cos i felt guilty $1.65 free shipping.
I used this:
And added a 3d printed fan shroud, I took a chance on this one since it was cheap, had ok reviews and claimed to have a larger heat block, I was hoping that it would make up the distance, which it did.
Did you have to do any additional polishing or modification to that clone or did it work “out of the box” for you?
worked right out of the box for me.
How do you dial back the extrusion steps in the firmware.?
I haven’t done that yet, just reducing the extrusion multiplier in Simplify3d is doing the job for me for now.
I have made a new discovery that i can now mount 2 clones side by side just waiting for them to arrive.
the brass part is a extender not a taper thread adapter but it looks like your clones dont need it.
the ones i ordered were for the monoprice mini and are shorter.
As for the stepper gear you can use a bottom stepper with the gear pushed further down the shaft but i like the bigger gear just need to slow the extrusion down atad more than what octoprint will let me
I think in slic3r i can set the range no limits.
wouldn’t you be able to calibrate using the usual gcode and pronterface while its connected to a pc via usb?
Tell me how. I. Am stuck no mater how i change my e steps it still feeds the same amount
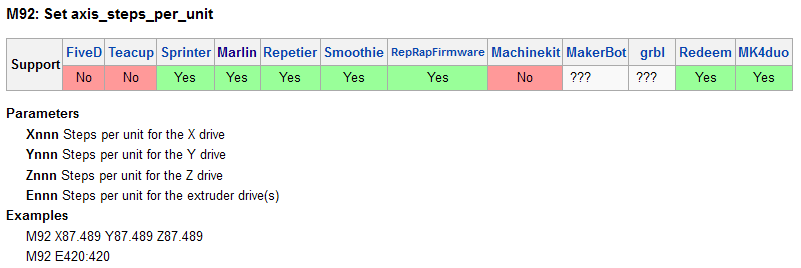
Easiest way to change the Steps per unit is to install the Marlin-EEPROM-Editor-plugin in octoprint. Jusi install it via the plugin installer included in octoprint.
Then, goto Settings --> Marlin EEPROM Editor --> Read EEPROM --> type the new values into the fields --> write EEPROM.
Works even in mid-print, although I would not recommend it…
Another way would be to set a command M92 into your gcode startup script in Octoprint:
setings --> gcode scrips --> when printer connected:
source
The third way is, to save the parameter from the M92 command into eeprom with “M500 M92 E200” (for 200 steps for example) --> that is exactly what the EEPROM editor does in background.
2 Likes
Thank you will give it a go
so was the m500 command not working? that is the one that is supposed to save the new m92 setting to the eeprom
I tried the marlin editor it worked first time extrusion spot on in fact. 100mm was 100mm with no bits left over
Thanks for the tip it made it so easy
I am more a mechanical guy than
software.
Its printing at the moment and looks way better
1 Like