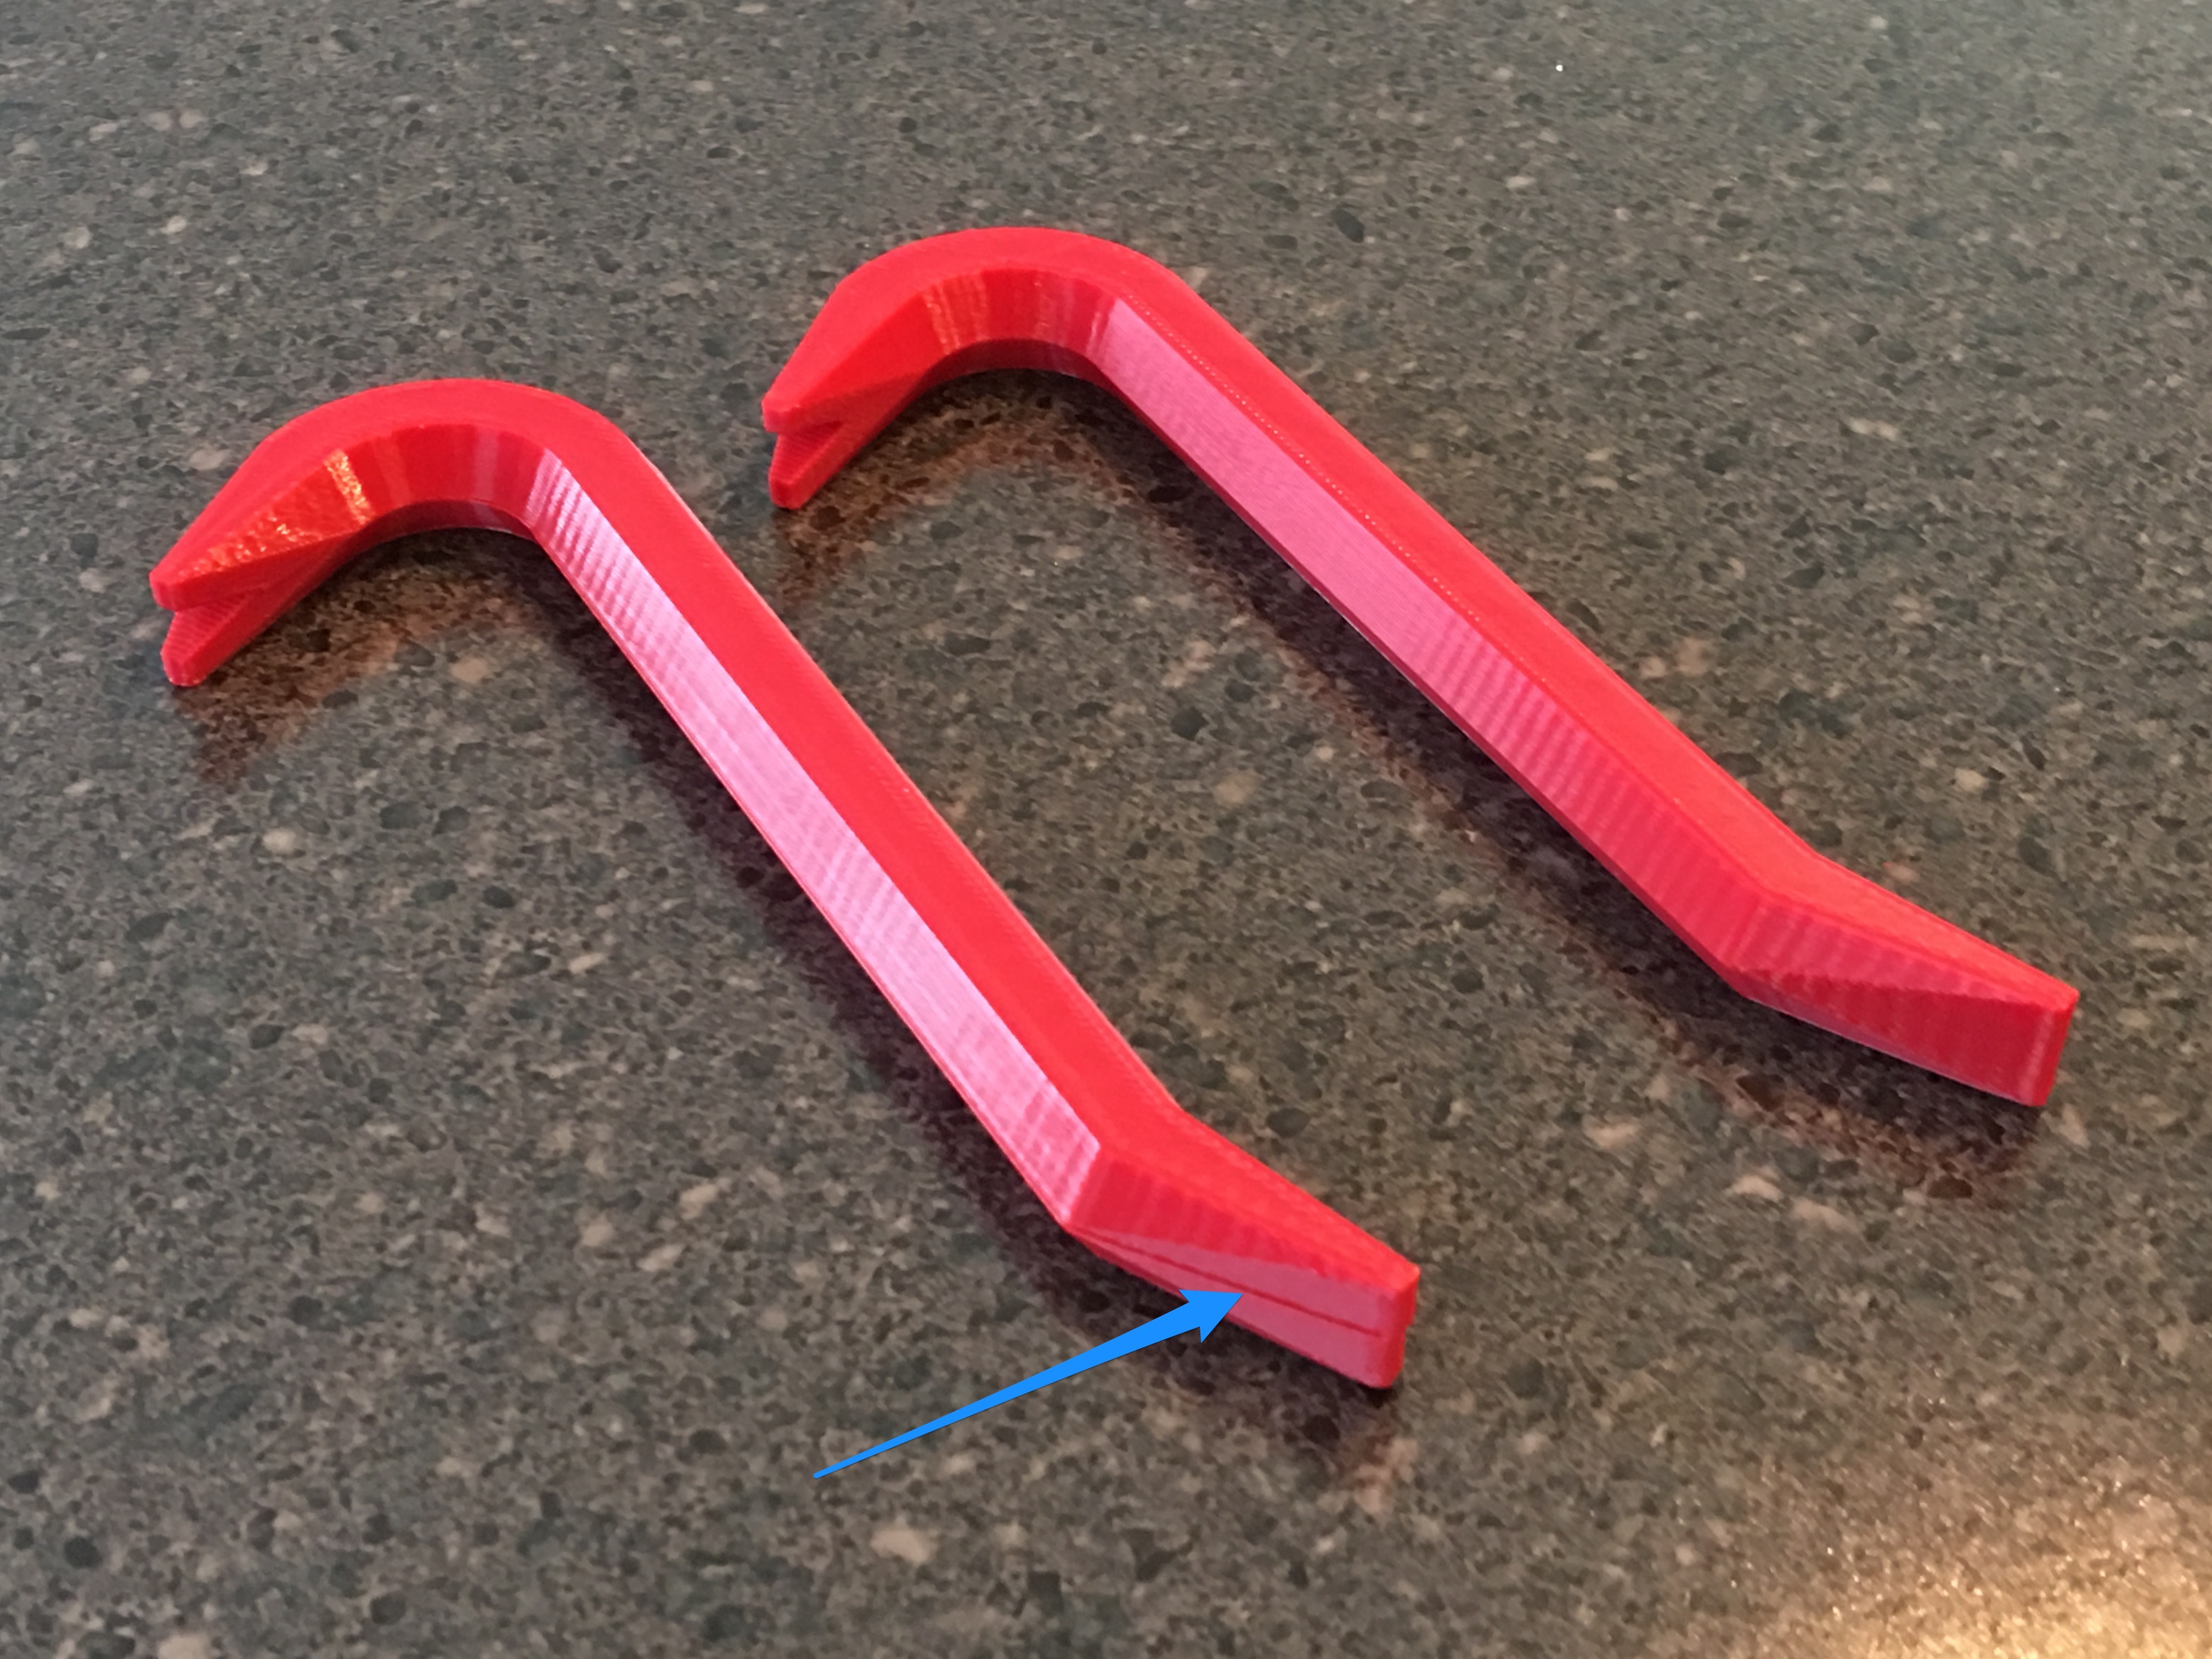
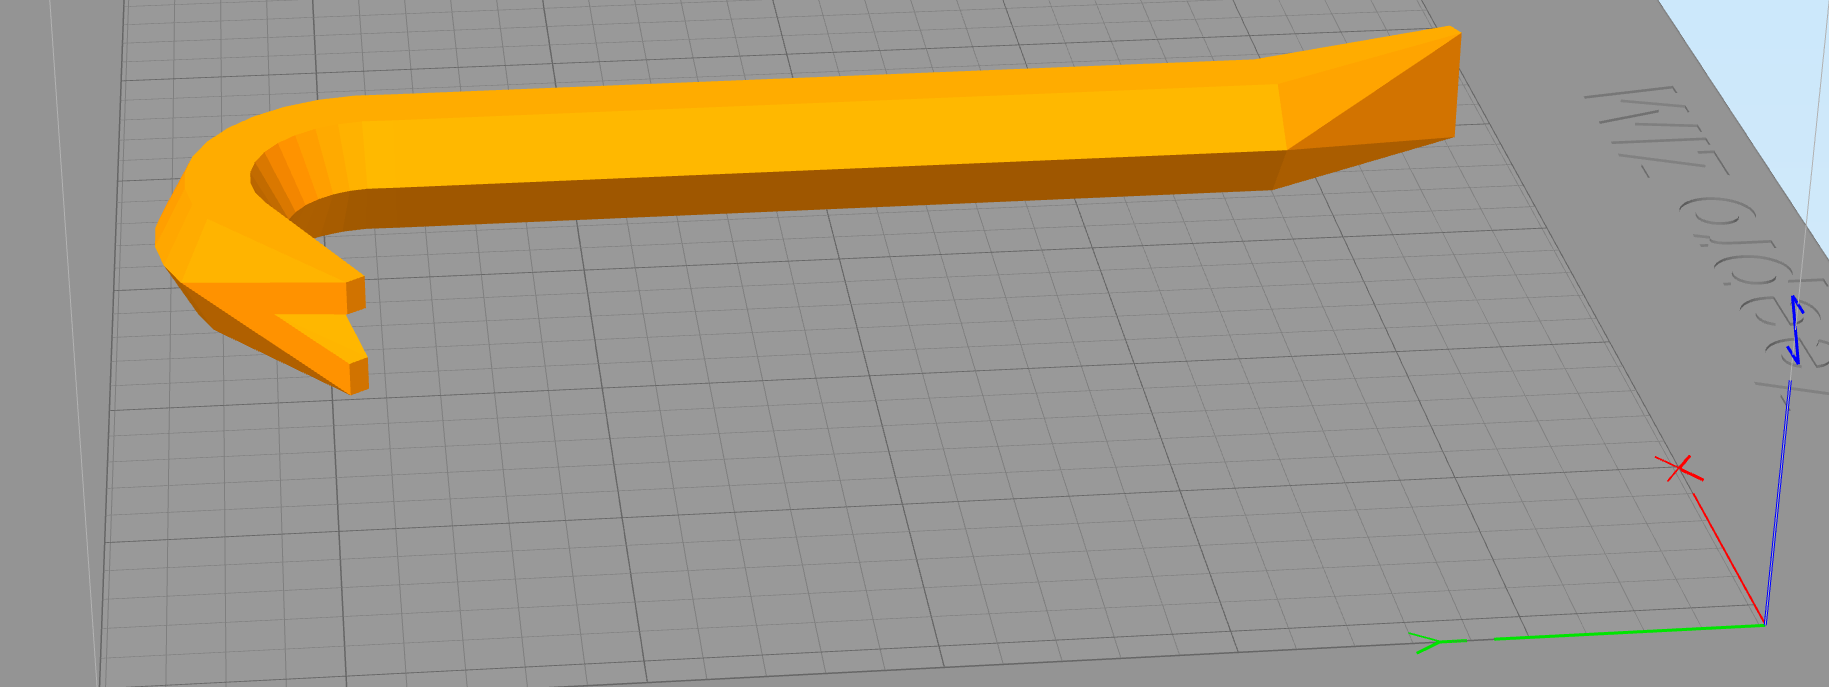
The crowbar on the left in both pictures has shifted to the right(first image)/left(second image) in the middle at layer 28. You won’t see it in the preview, but it prints that way every time. I tried all kinds of speed decreases, even modifying the travel acceleration and xyjerk setting to no avail! After I simply rotated the part -90 instead of 90 on the Z axis, it sliced and printed perfectly.
#How to reproduce:
Import into Simplify 3D and rotate on Z axis 90 degrees for the bad slice.
Import into Simplify 3D and rotate on Z axis -90 degrees for the good slice.
If anyone is a GCODE wizard and can tell me what’s gone wrong at layer 28, please let me know
I had issues with Simplify3D when slicing this part: created the design on my own and usually Simplify3D NEVER fails but at this part it failed at the radius right at the “V1”: http://www.thingiverse.com/thing:1186445
One of the triangles was inverted - have you checked if Simpli imports your stl right? :-/
It’s interesting that you mention inverted triangles because I originally used Netfabb basic to check the part and it had what looked like an inverted triangle along one of the sides. I repaired the part though and Simplify3D has not seen any mesh errors with it since, but still has this shifting problem. When you say “Simpli”, what program do you mean?
Ok I went back to Sketchup and made sure all faces were facing out, and verified this in Netfabb Basic and also verified that Simplify 3D doesn’t report any errors.
Now I thought this was a weird fluke when I first printed it so I didn’t mention it. I swear I had some issues with the filament sticking coming out of the spool. Alas that was not the issue because here is the same problem again. So the VERY FIRST TIME I TURN ON MY PRINTER, this is how it will print:
I guess you already have lowered the acceleration settings and speeds: e.g. I travel at only 60mm/s with this heavy two stepper toolhead at my ZIM.
Please also check if the springs which hold the belts tight (on BOTH sides!) are under tension.
Also check if your second nozzle does not touch the printed part or at least heat the second (unused) nozzle up - had that issue and it caused a layer shifting too.
Really interesting issue - please post the solution as soon as you were able to solve this!
I had some unsolvable slicing problems as well. But the failed slice was very obvious visible in Simplify3D.
Just contact the support and they answer quickly.
One file I had to slice with a different slicer to get it printed, another file the support sliced it for me, after I sent them the file and profile and for another they gave me this solution hint:
To troubleshoot this irregular slicing behavior I would recommend
troubleshooting to see if it is due to Self-Intersecting Surfaces. To check
if this is the case, please go to Repair–>Identify Self-Intersecting
Surfaces. This forum post has more information explaining what that means
and some good ways to fix it: https://forum.simplify3d.com/viewtopic.php?f=8&t=3177
There are two tools mentioned in the forum post for fixing
self-intersecting surfaces (Separate Connected Meshes and Merge All
Outlines into a Single Solid Model). There is also a link to a free repair
site that can fix problematic meshing in 3D models ( https://modelrepair.azurewebsites.net/)
But from the looks of it, it does not seem to be slicing related. It looks more like slipping belt teeth due to too much speed or collisions, like KingMartin mentioned.
M203 X1000 Y1000 Z100 E1000 ;set max feedrates
M201 X1000 Y1000 Z100 E2000 ;set max printing acceleration
M205 X15 Z0.4 E5 ; set max xy, z, e jerk (speed change that does not require acceleration)
The belts seem to have the same decent tension they always have. Just checked.
I actually removed the right nozzle just for that very reason, some time ago. So that’s definitely not it
I’ve run all of the built in Simplify 3D tools to check for any errors and they all say there is no issue. The part is completely hollow and I’m printing at 10% infill.
I’ll try printing one at 10mm/s flat across the whole part and see if it’s speed related.
I have also contacted Simplify 3D about this issue, and pointed them to this thread. No response yet though.
One other thing I recently changed was I have been using relative mode and switched it to absolute mode. I think I might switch that back and see if there is a difference as well.
I’m going to be out of red filament soon with all of these test prints… lol.
I Like solving confusing issues: that’s why I own several (more or less) Open Source printers
In my post above I wanted to ask you about a G54, G92, M92 command or similar you maybe entered but deleted it.
Switching back from relative to absolute mode should not change anything except you entered your own values in the starting script (do not know the exact name as I’m not in front of my Windwows computer with Simplify on it)
Maybe also try to rotate the part on the printbed and see if the shifting will rotate too!
G28 ; home all
M203 X1000 Y1000 Z100 E1000 ; set max feedrates
M201 X1000 Y1000 Z100 E2000 ; set max printing acceleration
M205 X15 Z0.4 E5 ; set max xy, z, e jerk (speed change does not require acceleration)
##What the beginning of my GCODE looks like
G90
M82
M106 S0
M104 S0 T0
M104 S190 T1
M109 S190 T1
G28 ; home all
M203 X1000 Y1000 Z100 E1000 ;set max feedrates
M201 X1000 Y1000 Z100 E2000 ;set max printing acceleration
M205 X15 Z0.4 E5 ; set max xy, z, e jerk (speed change does not require acceleration)
##My Simplify 3D Ending script
M104 T0 S0       ; extruder heater off
M104 T1 S0       ; extruder heater off
;M140 S0         ; heated bed heater off (if you have it)
G91              ; relative positioning
G1 E-1 F300      ; retract the filament a bit before lifting the nozzle
G1 Z+0.5 E-5 F{travel_speed} ; move Z up a bit and retract filament even more
G90
G00 X140 Y140    ; move X/Y to min endstops so the head is out of the way
G0 Z150 F600     ; lower the platform completely (could be Z140, depending on thickness of your Platform)
M84              ; steppers off
M82              ; absolute positioning
M106 S0          ; disable cooling fan
BTW I was just manually playing around with the max feed rates and acceleration rates by manually sending the command in the terminal, and then jogging the printhead with the X / Y controls. And the 9x lower values I was trying are no different for acceleration.
The defaults are M201 X9000 Y9000 Z100 E10000 and I was trying M201 X1000 Y1000 Z100 E2000 but you don’t really even see a change. I tried M201 X200 Y200 Z100 E2000 and started to notice it was smoothing out 0-60 speed change with acceleration in there. I’ll want to give this a try in a real print as well.
Now we are coming full circle why I thought it was originally a slicing issue. If you see in the first post, flipping the part -90 instead of 90 makes it print out fine
I updated the first images to really point out where the shift is happening… I know it’s hard to probably spot it.
I lowered the Z offset by -4mm so that layer 28 would be layer 8… get to the problem area faster.
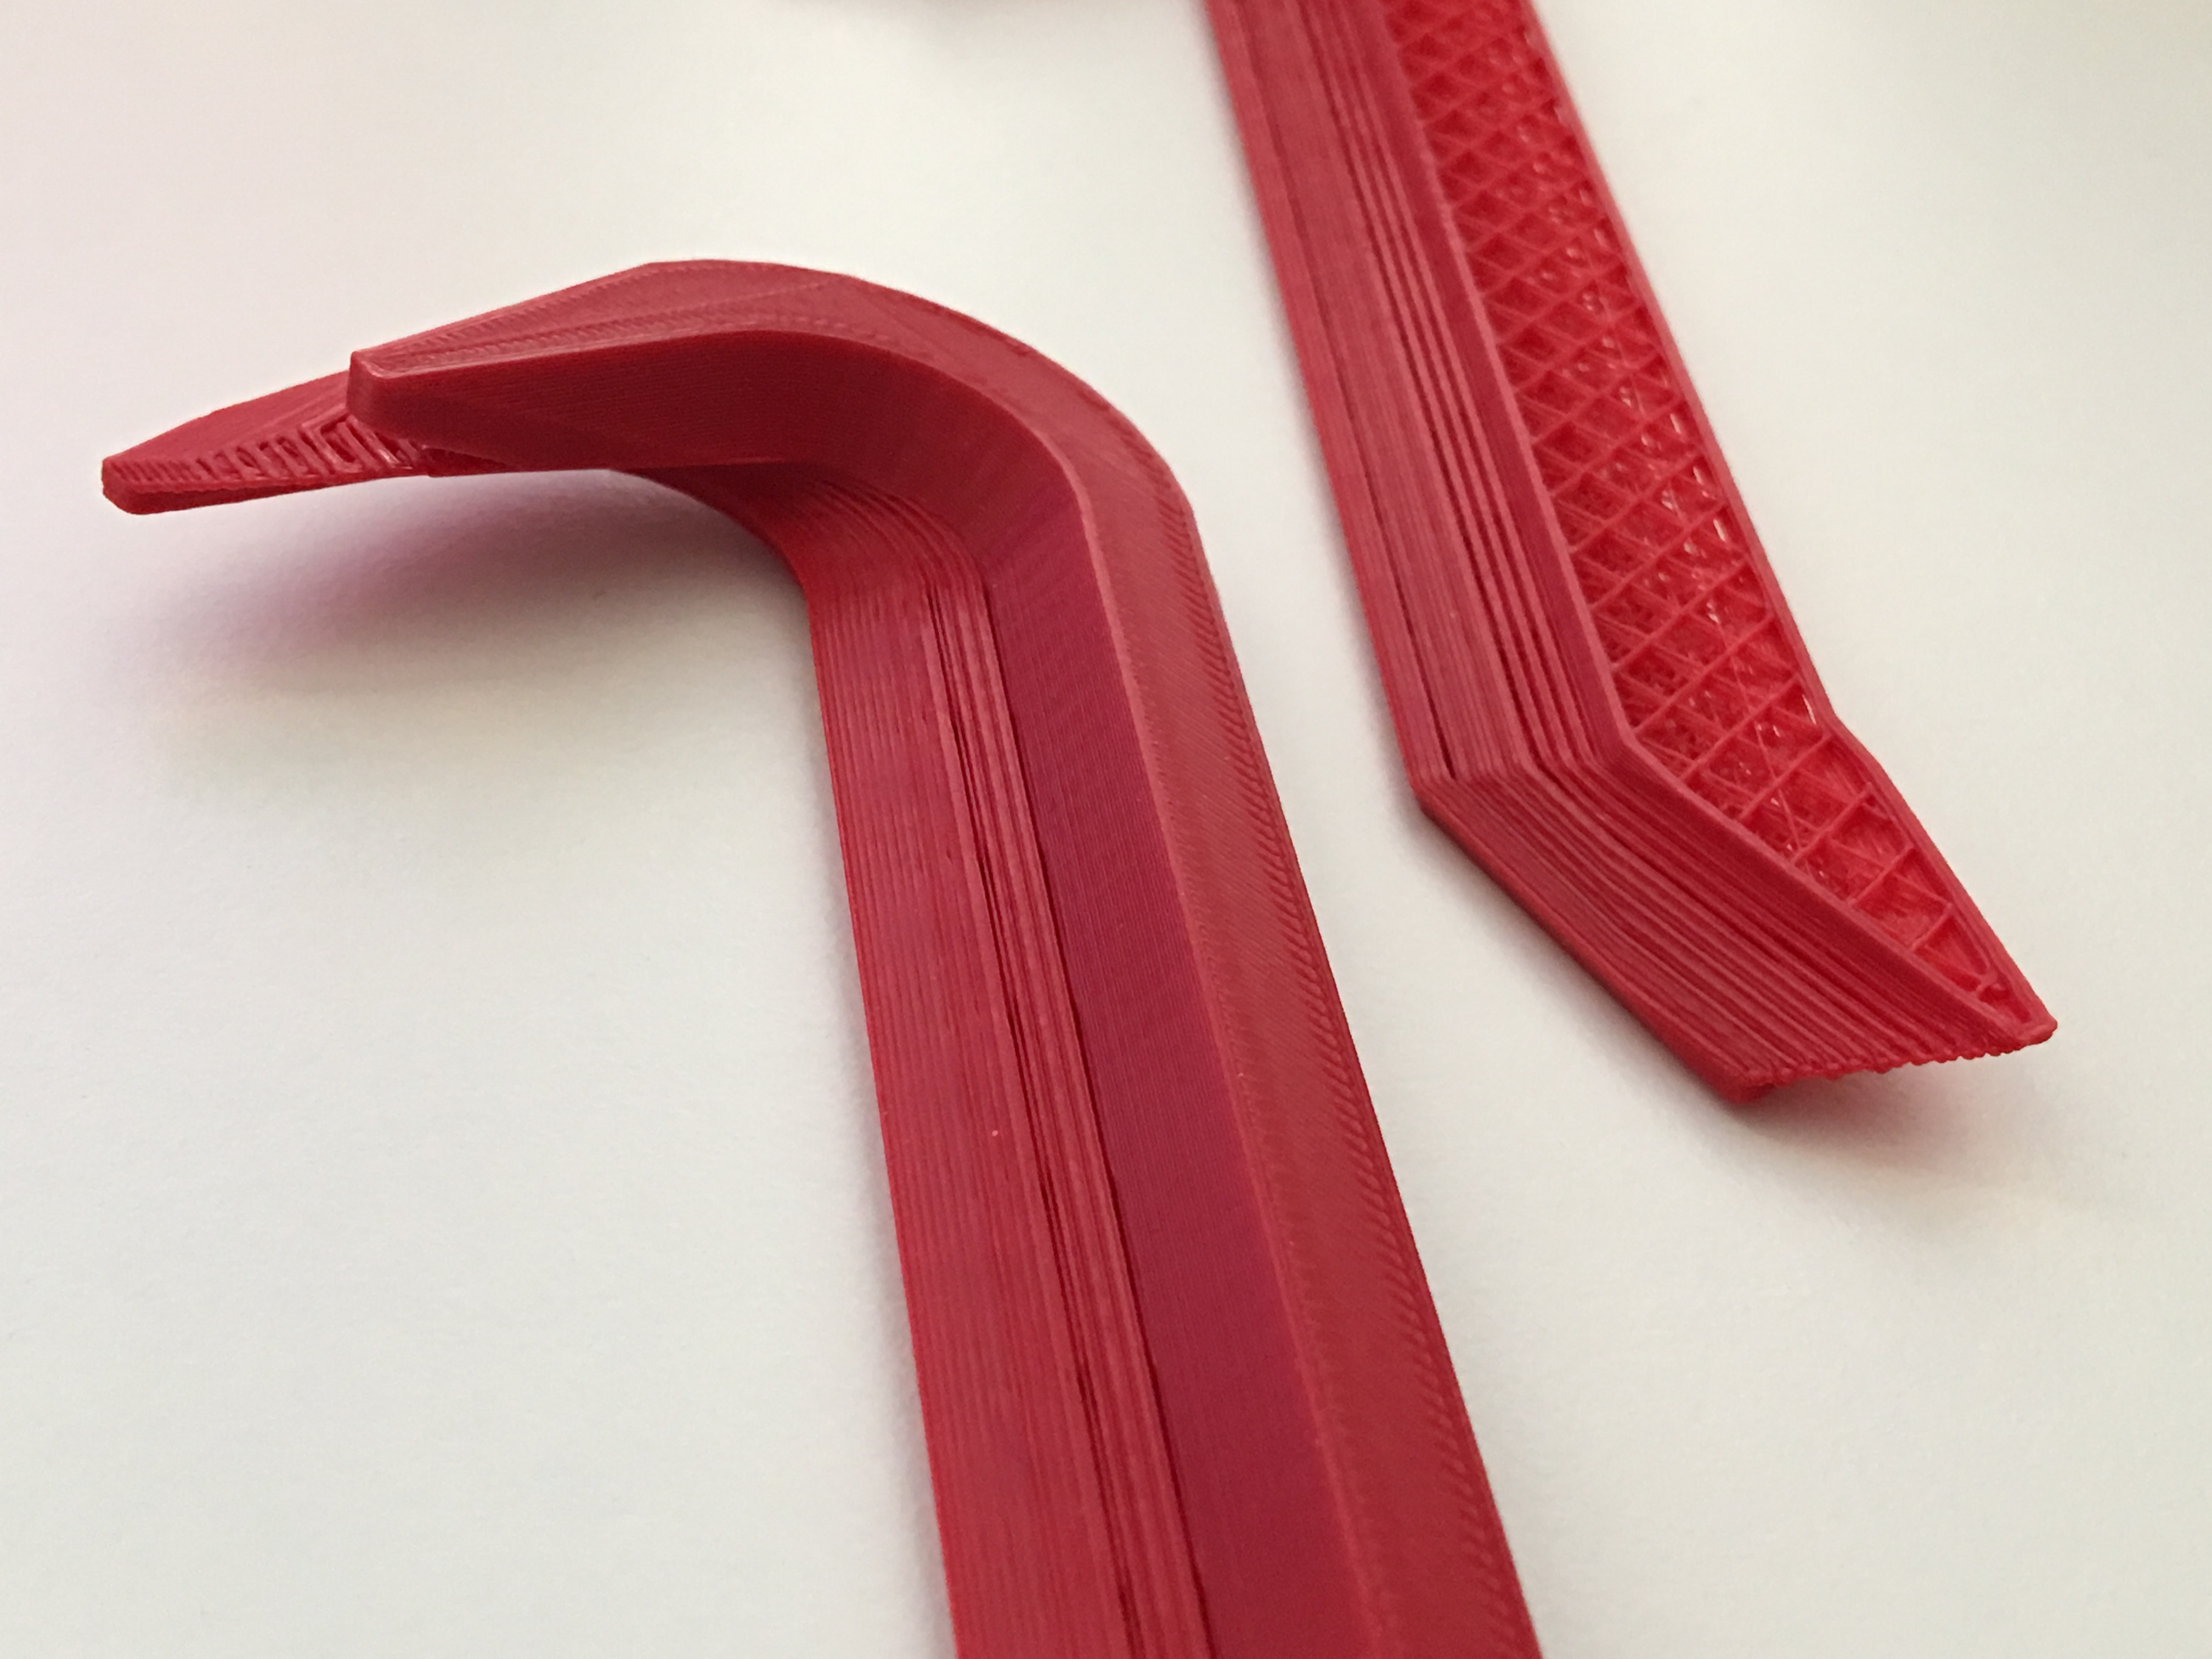
The first one printed out with sever shifts in just the first layer! (LEFT)
The second one is the same GCODE printed right after the first was cancelled (RIGHT)
Just tried dramatically reducing the acceleration M201 X100 Y100 Z100 E2000 until the printer was floating back and fourth and still have the same shift in the part. Check out the video here to see the smooth and quiet (well the fan overpowers everything) action (you can see the shift at layer 8) https://www.dropbox.com/s/im90om3q5gczrgv/smooth-accel.mov?dl=0
##If you’d like to help, please try these on your Zim (left nozzle, PLA, octoprint) crowbar5-60mm-normal-accel crowbar5-60mm-slow-accel
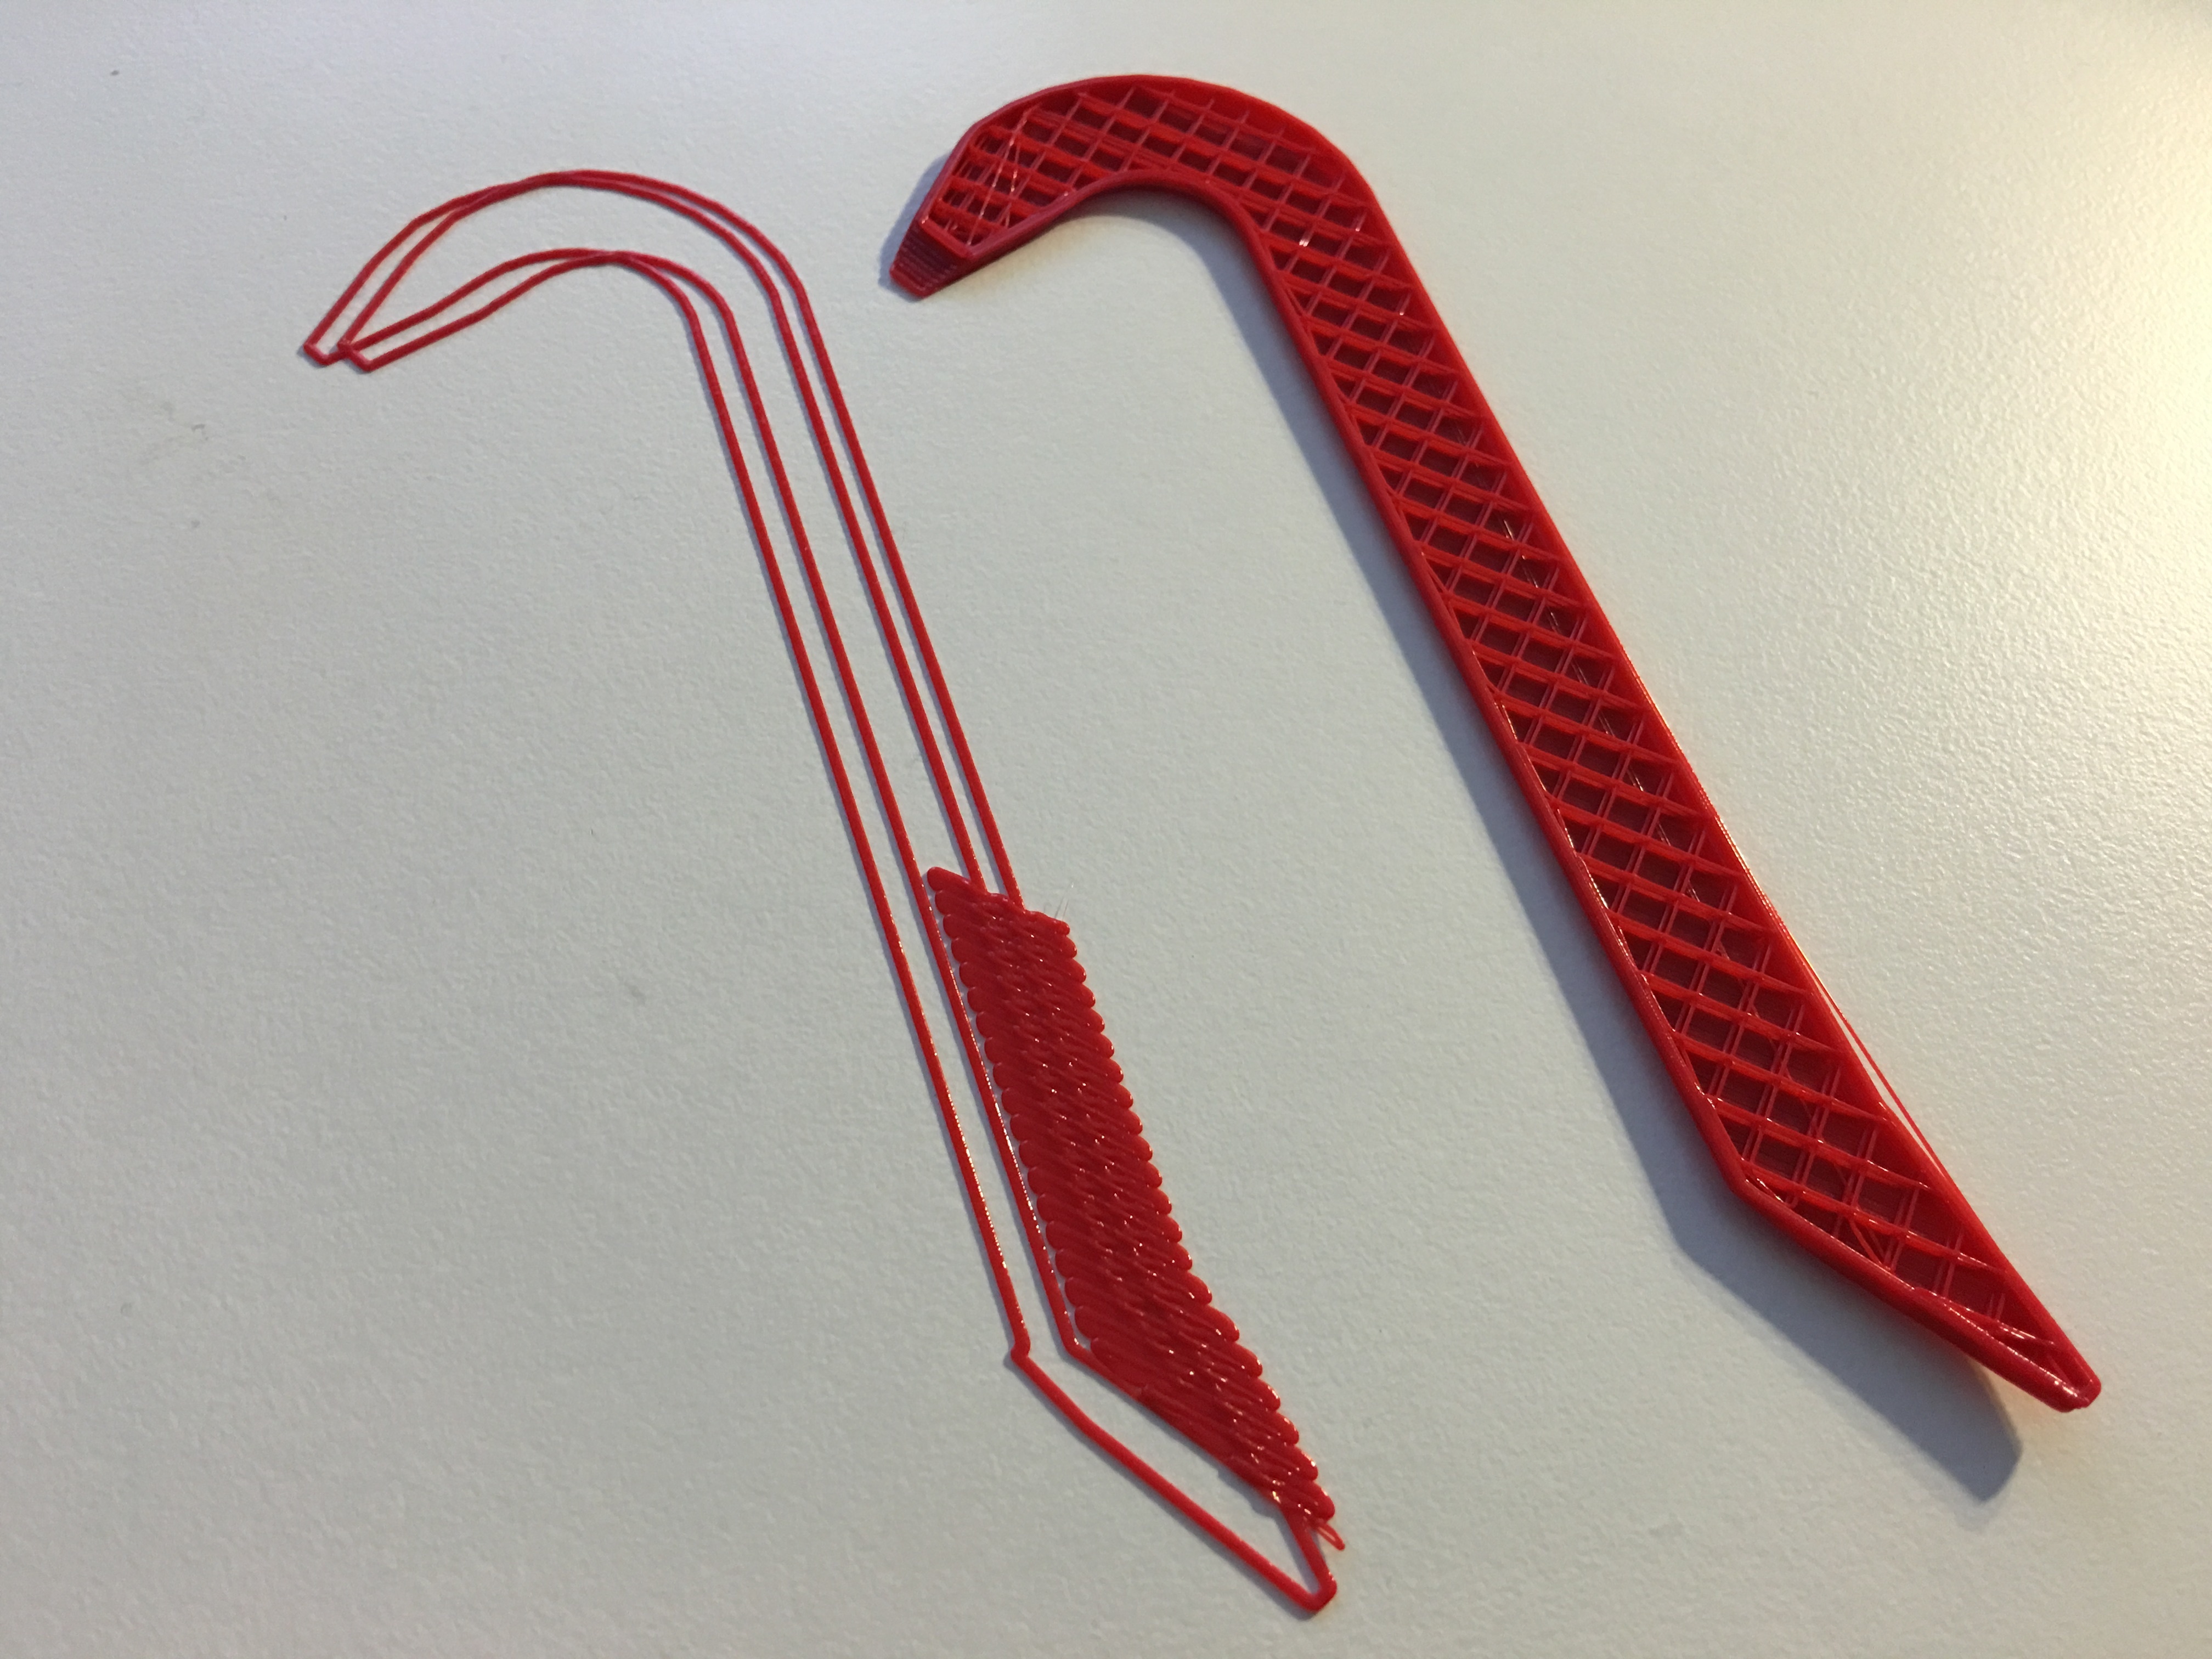
Just cancel after layer 14, you should be able to tell if it’s shifted by then.
With the first layer shift I had that issue and opened a thread a few month back. Without solution, as I seemed to be the only one having it.
It was about that my printer did run into the endstops and got reflected and the next loop was shifted a few mm opposite to the x or y endstop.
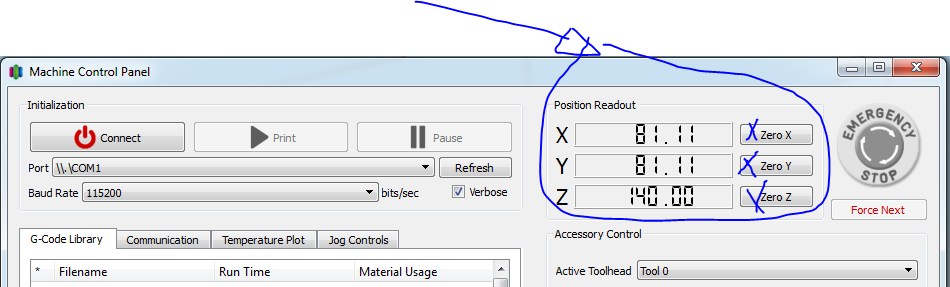
What helped in my case was using a smaller build volume of 135mmx135mm and homing all axxis manually with jog control into the endstops and zeroing the values in Simplify3D.
Ya-know, I had thought about this… but somehow the thought slipped my mind to actually check it. Looking at it now I see that the part is basically just about the same size as the available build volume on the Y axis… AND the center of the crowbar at the top just happens to be the largest cross section which would mean the Y endstop is likely being hit.
Hitting the endstops during a print should pause the print, don’t you think? That sure would have saved me a lot time and filament.
After homing the X/Y, when I manually jog the X/Y while watching the Octoprint terminal, I can see these messages after I bump the endstops
No it does not and I’m not sure if this is a good idea if the printer pauses itself.
I had this layer shifting problem as well when I printed ABS and PLA as a support material - thought you have checked hitting an endstop already, but thought about that at your first post too.
My dual print -which was also shifted due hitting and endstop - turned out fine at the end so I would say not pausing is better than pausing…


 Hitting the endstops during a print should pause the print, don’t you think? That sure would have saved me a lot time and filament.
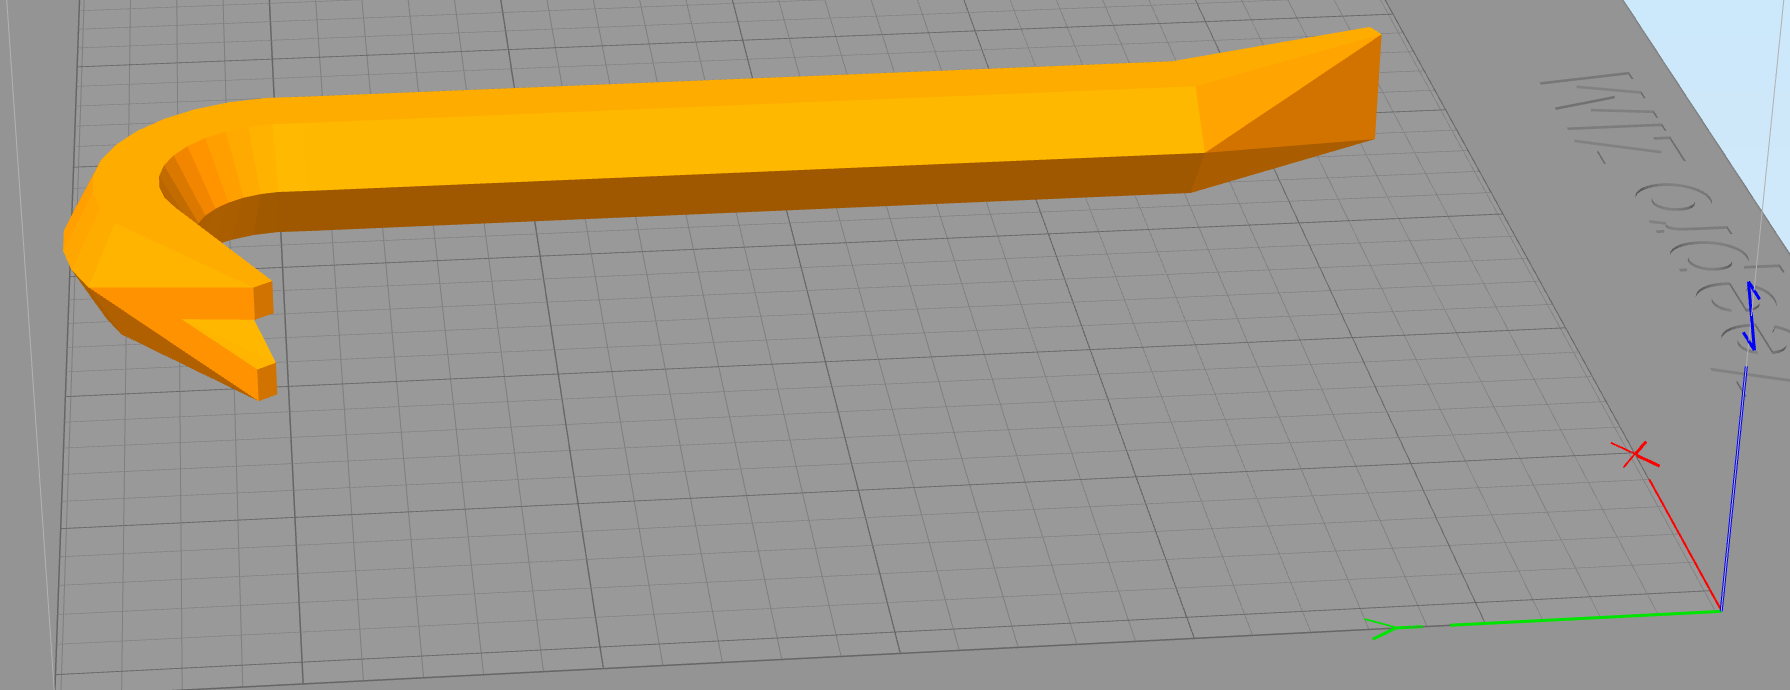
 it would be super nice if Simplify3D generated an error for prints outside your build volume
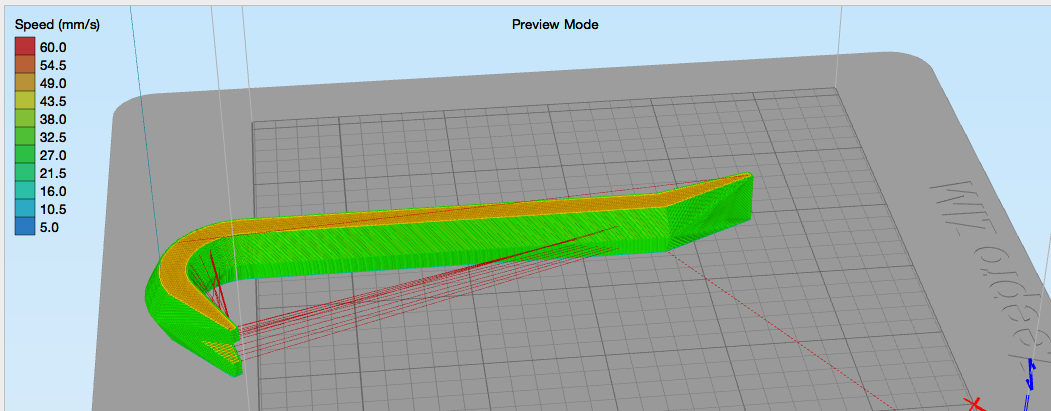


