Ok so here’s my OctoPi conversion notes:
The first thing I did was test my Zim once last time with Zeepro firmware. When I powered it on it got an update to 1.8.3. I loaded a very small test piece that should normally load and slice very quickly. The machine was pretty laggy even just loading the part and then very laggy to slice a tiny little piece (smaller than a toothpick), but it did work and the part printed as it always did before. My theory on this is that Zeepro is possibly using a scalable cloud platform like Heroku or Cloud9 to run their cloud slicer, and now that they are defunct they turned off all of the extra dynos (CPUs and RAM) that you’d normally pay big bucks for each month and just have it still running on the free tier (which will work but be really slow). If that’s what happened, kudos to them for not completely shutting it down and rending the Zim utterly useless.
So I started by trying to unload my filament (probably didn’t need to do this but I thought I might need the room or soemthing… turned out to be a good learning experience) the zeepro way and the left cartridge worked fine but the right cartridge’s filament was broken down by the base so I had to get crazy with it to unload this side. Long story short, as part of this work I found that the filament gets caught as it enters the teflon tube right past the microswitch at the cartridge bay. Something it probably always did in the past but I never noticed. So now I figure it’s a good idea to manually shove about 6-12 inches of filament into the tube to make sure it’s gets past this snag, and then push the cartridge in. Pretty soon I will replace these with the new bottom loader assembly.
Once the filament was out, I looked for a document that had the screws to remove for the baseplate so that I could get more room to pull cables off of the cubieboard which was getting replaced by the RasPi2 and get access to the zimboard. I’ll save you the trouble, here’s the pic:
Once the bottom tray was down, I decided to work on getting access to the USB connector on the zimboard. I figured for sure I would have to desolder one from my Arduino to put on here. Before I even tried to pry mine off, I unscrewed the zimboard from the baseplate. Bad idea. The screws and spacers that hold the zimboard down are a PITA and in my opinion a bad design, easy enough to take apart… hard to replace. Once I got it off though, as I pulled the zimboard away from the backplane, the USB connector cover just fell off. I was shocked, it wasn’t glued in at all! I got one of the earlier units so they might have not started gluing these yet… but a win nonetheless. I removed the cubieboard and saved all of the hardware for it.
Now it was time to write the octopi image to the flash card. I ended up getting this complete starter kit from amazon, and everything was great except for the power supply, which wasn’t not UL approved and does not snap into the USB connector on the Pi like all of my other micro usb cables do… it’s just a loose unsettling feeling but it works (for now)… I’m going to replace it with a proper power supply.
I used Apple Pi Baker to write the image using my Mac, and it worked great.
There were a few stumbling points in the tutorial video, like I did not have a ~/etc/network/interfaces path, but the file can be edited via an absolute path by sudo nano /etc/network/interfaces from anywhere. I edited the interfaces file with my home Wi-Fi credentials and it connected right away. Something to note is if you forget your Pi’s IP address, you can look in your router at connected wireless devices and it should come up with a name of octopi.
I didn’t see a reason why I needed the ethernet cable plugged in, but I did have one plugged in. You could probably omit that step?
You can SSH into the PI super easily with a Mac:
ssh pi@192.168.1.x (whatever your Pi’s IP address) was, then give it the “raspberry” password.
My Octopi was at version 1.2.2 and needed to update to v1.2.6, but it kept failing to update for some reason. So I SSH’d into the Pi, and cd OctoPrint/, from here you can simply run git fetch && git checkout 1.2.6 and this will pull the tags and checkout the github commit tagged as version 1.2.6 ( which was the current newest version of OctoPrint ). After rebooting the Pi and loading up OctoPrint, it was still v1.2.2… but now running the Software Update command worked and I ended up with v1.2.6.
I went straight for updating my zimboard firmware to jpod’s modified firmware, which was super easy. I would suggest renaming the Marlin.ino to marlin-zeepro.ino so there is just one less step to do when you have to rename the folder to marlin. Since we are clearly diverged from the original marlin firmware at this point, there is little reason to keep that file named simply Marlin.ino  Great work on digging into this firmware jpod! I see references to driving an LCD from the zimboard, and I’m wondering if that’s useful and what is displayed on it.
I went through jpod’s tutorials on how to add simple fixes to the default gantry speeds and z-axis inversion and the camera worked perfectly. Another thing to note is that the camera is WAY LESS laggy than when running on the cubieboard. It’s almost real-time now verses a 30 second lag!! I went through the advanced scripting tutorial and created the Lights on/off buttons and load/unloadFilament scripts. I used Filezilla on windows with the SFTP protocol (port 22) and was able to load these files easily. When I tried the loadFilament script, it didn’t load nearly long enough to run filament all of the way up into the extruder. I found through manual control that 1400mm was about right for both cartridges, so I’ll have to edit this in the script once I figure out where to put the right commands.
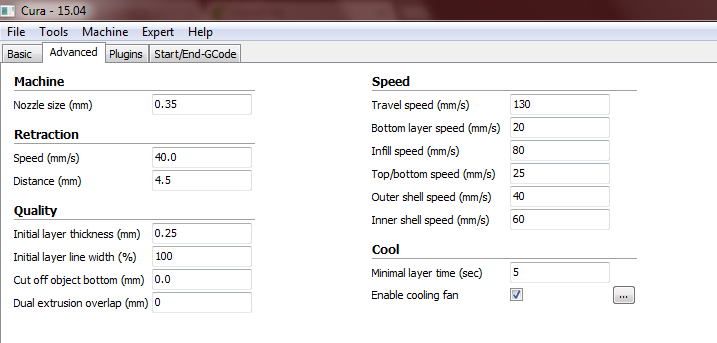
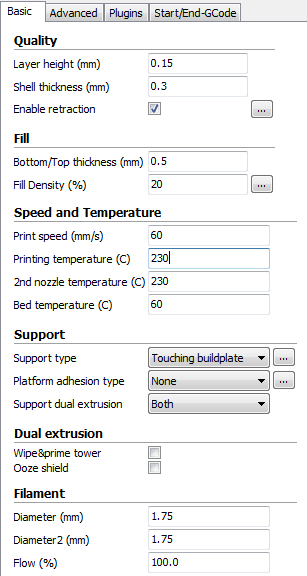
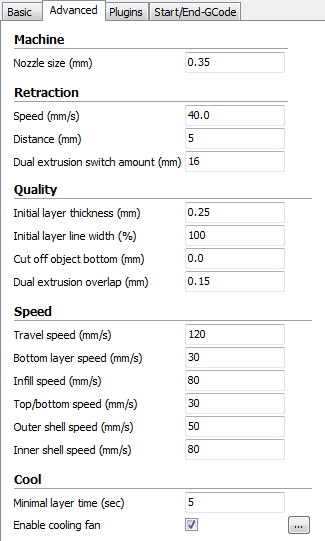
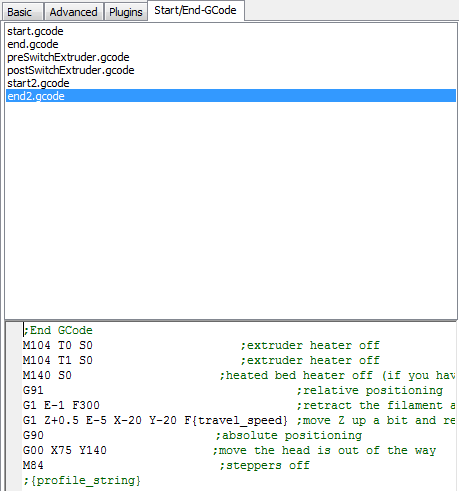
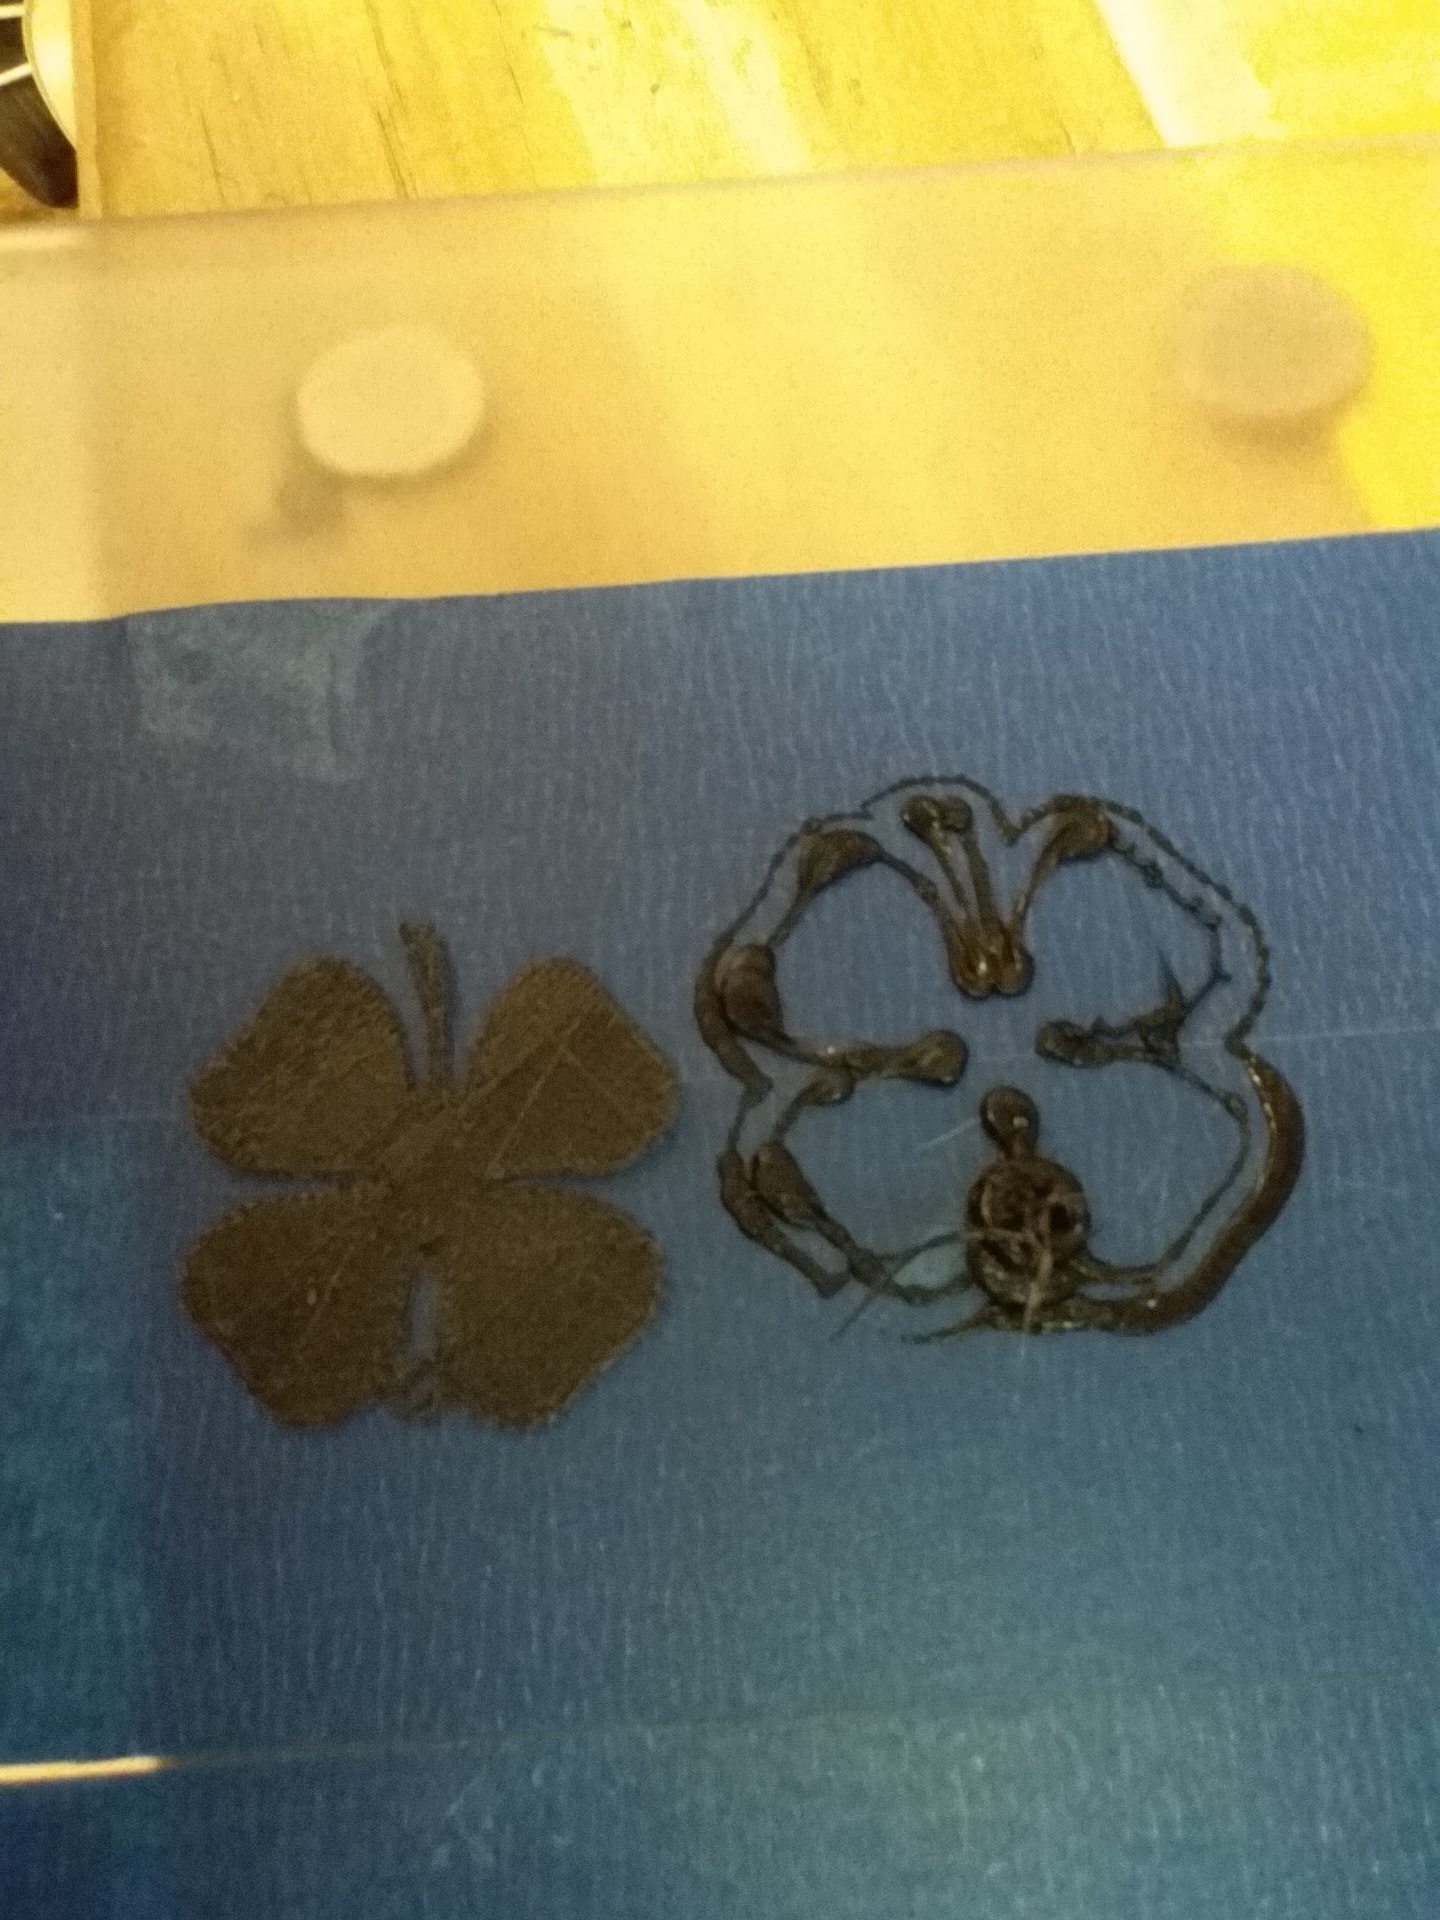
Once I was ready to print, I was hung up by the fact that I could not do onboard slicing before I uploaded a Cura profile. Only recently did @J_Schmidt add screenshots of his profile, which I tried to initially re-create with the lastest Cura on Mac… but everything was looking too different, so I downloaded the exact version he used for Windows and was able to get something going. That said, I wish a file was available!!.. so here’s mine:
T0 and T1
T0 only
T1 only
About this Cura profile, it heats up BOTH extruders regardlessly, and I cannot find a way to select tool0 or tool1 dynamically. Is this something we need to create individual profiles for? I’d love to see your profiles for this if you guys have figured this out. BTW, on my Zim, T0 is the right extruder, and T1 is the left extruder. Not sure how you guys have it, but my LEFT cartridge feeds the LEFT extruder (which we all know is driven by the LEFT lower and RIGHT upper steppers). Not sure if this is different from what you guys have, but I might have done that to make it more intuitive when I had all of my teflon tubes removed.
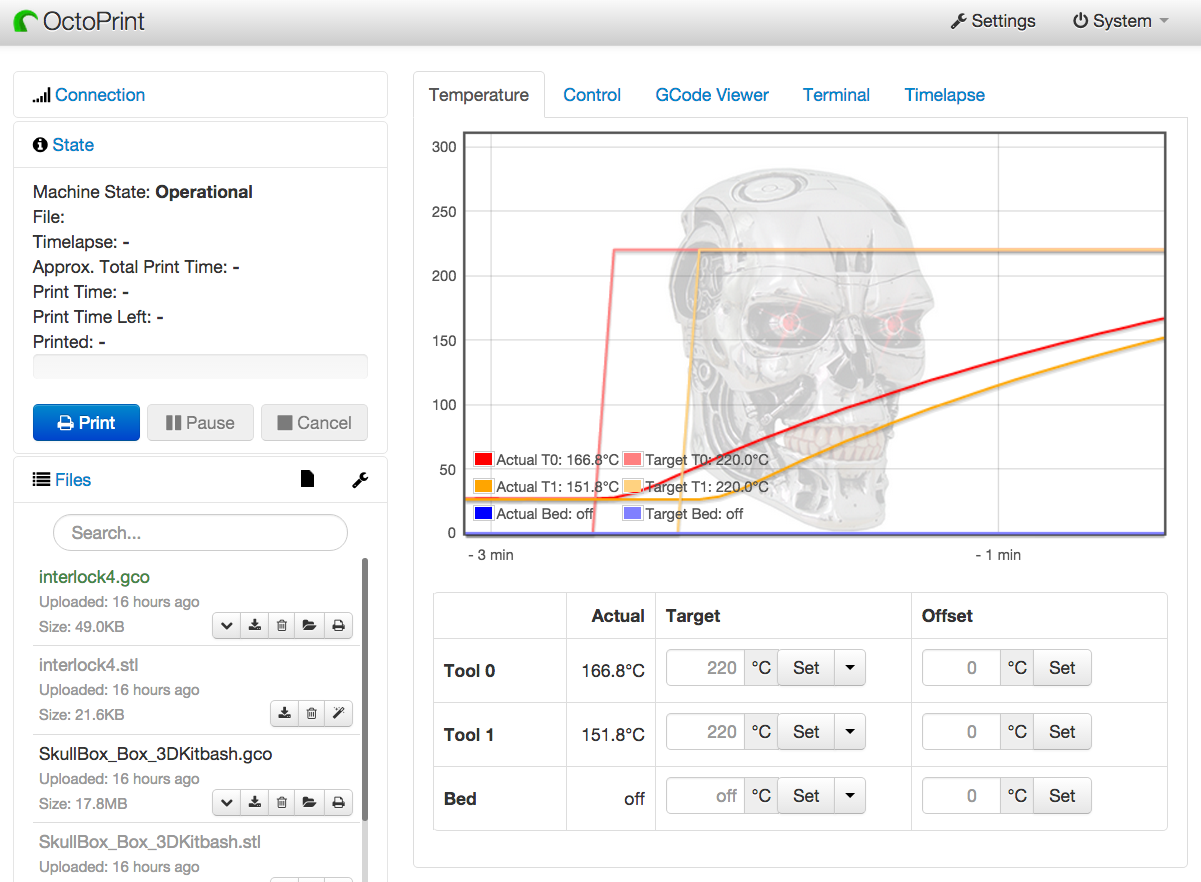
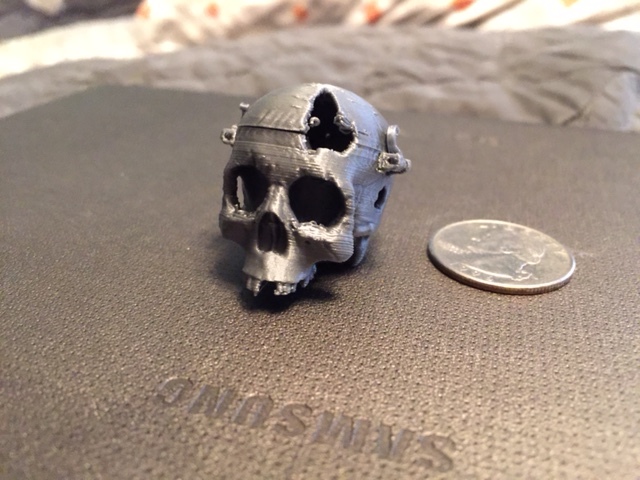
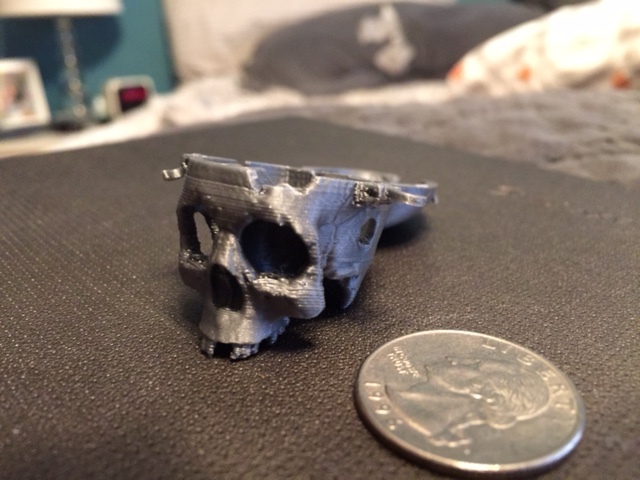
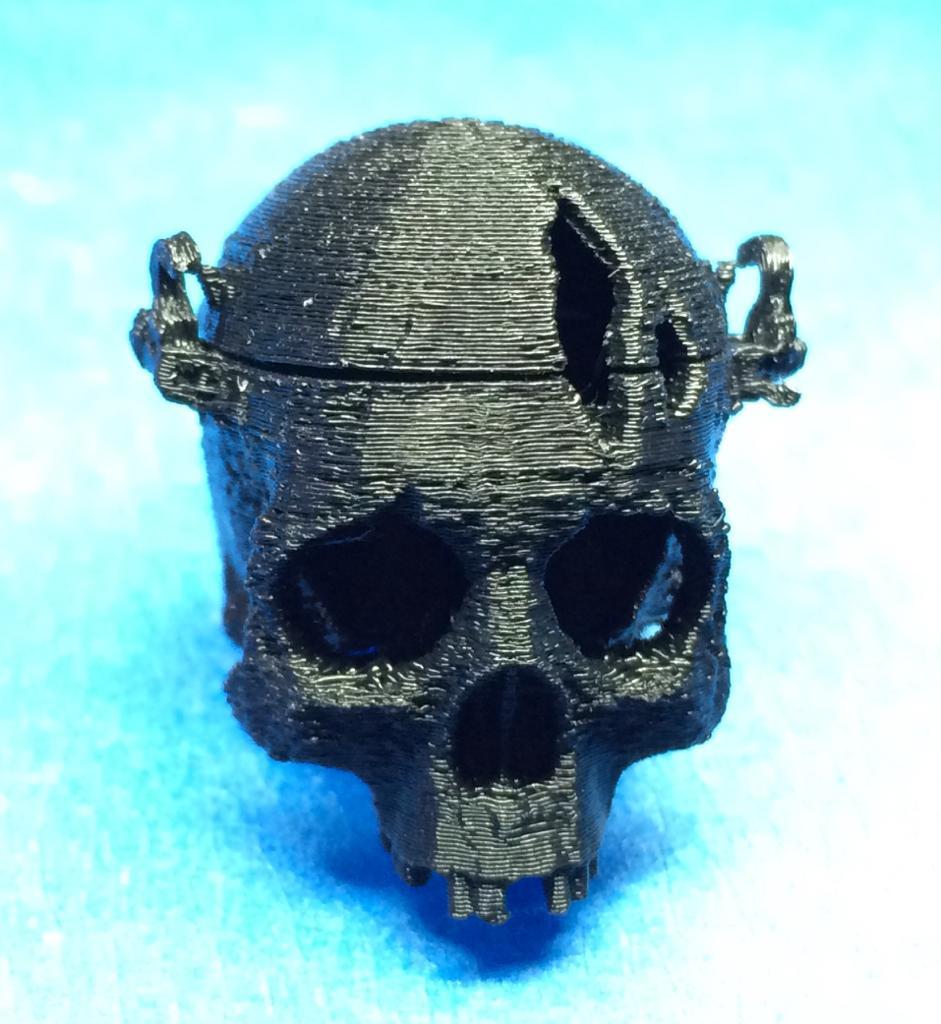
I didn’t have any issues with my 69 minute long print timing out (see skull in previous post). This is really fantastic and I couldn’t have asked for a better end result. Thanks @jpod for putting the tutorials together, and thanks everyone for contributing to this epic and necessary collaboration! It’s really quite thrilling to be in control again of our printers.
Also figured out how to change the background image on the graph… the octoprint octopus is cute and all, but he more so creeps me out. This is the image you need to change:
./home/pi/oprint/lib/python2.7/site-packages/OctoPrint-1.2.6-py2.7.egg/octoprint/static/img/graph-background.png
I like to just keep this file in my home/pi directory so after new updates I can run this easy command without having to SFTP the file every time:
cp graph-background.png oprint/lib/python2.7/site-packages/OctoPrint-1.2.8-py2.7.egg/octoprint/static/img/graph-background.png
and after running this command and refreshing your web browser you’ll see it:
sudo service octoprint restart
Time to get designing and printing a simple hub for CD/DVD mousetrap car wheels for an upcoming meetup I’m doing for the kids 


 Great work on digging into this firmware jpod! I see references to driving an LCD from the zimboard, and I’m wondering if that’s useful and what is displayed on it.