I just bought my Zim on ebay for $150 usd and it’s my first 3D printer but now I am starting to feel like this printer is not for an entry level user. I am waiting for my printer to arrive in the following days and I have read a lot of posts in this forum but I feel overwhelmed and confused.
I have a lot of questions but my main one is: where do I start?
I bought a raspberry pi 3 and I will install octoprint tomorrow following the jpod tutorial. Then, what do I do?
-The raspberry pi will replace the A10 board?
-The motherboard is an arduino?
-How do I connect the motherboard to the raspberry (Do I have to mod it to connect it via usb?).
-Do I have to update the motherboard?
-Can I use the 2 sample filaments that comes with the Zim?
As you can see, I am a lost and I will appreciate any help.
I also purchased my ZIM on ebay, so I’m working through a few of the same issues.
Your Raspberry PI will replace the A10 board.
The motherboard is Arduino based, so you can use the same tool chain as you would use for a RAMPS/Mega board combination.
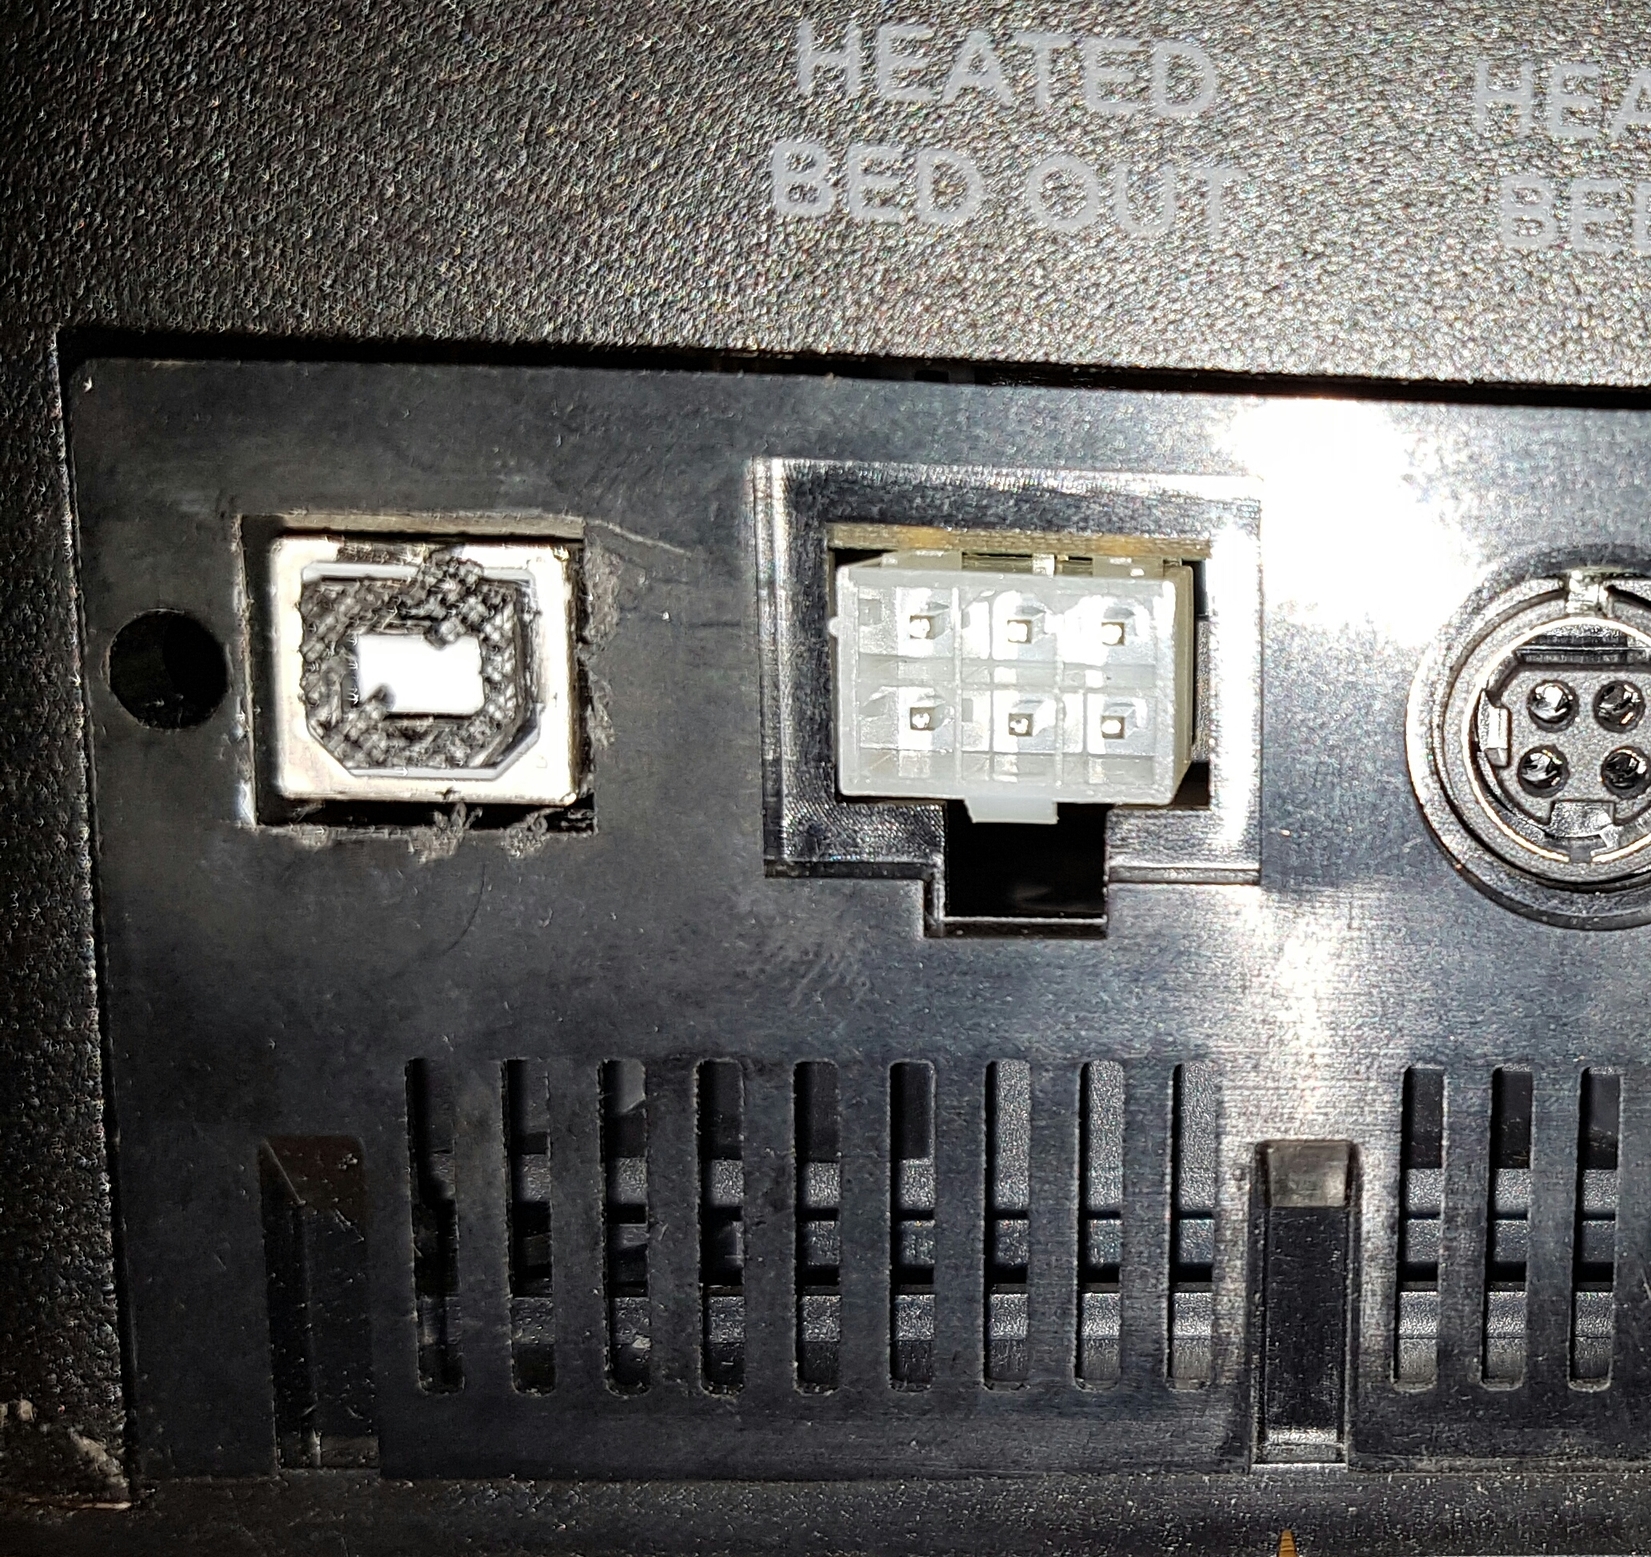
On the back of your ZIM, at the bottom far left, there will be a square black piece of plastic. That needs to be removed to gain access to the “B” type usb plug on the mother board. Some people have stated that ‘plug’ falls out, others say it’s glued in. Mine was a press fit, but couldn’t be removed without damaging the usb port. That port will be attached to your Raspberry PI containing Octoprint.
You should be able to use the sample filaments, there are other topics on this forum regarding both the filament use and updating the firmware on the motherboard. I’m waiting for my replacement “B” type usb ports to arrive, so can’t address those issues.
There is also a software image for the A10 board to “jailbreak” it, but it didn’t work for me. My ZIM also has a dead WIFI dongle, so I’m unable to connect to my WIFI network with the A10 board. I have a Raspberry Pi with Octoprint on it waiting for the replacement usb port.
Thank you for your answer. So I found this post about the usb port that you need to get access Opening USB port I will follow it as soon as I get my printer. My question is: with that port you get access to the motherboard bypassing the A10 board?
So the basic steps are:
Get access to the USB port (If I get lucky then)
Connect the Octoprint to the USB (with jpod configuration)
These are super cheap! And while the replacement parts are bound to be hard to get, you really can’t beat the price of this printer if you enjoy a bit of hacking. It would probably be a wise investment for anyone owning a Zim to buy one of these for future replacement parts
@BDub yes. I bought it from that seller, the main problem is that I live in Mexico so I am waiting for the company that I use to import things to Mexico to ship it to me. I think I will have it until 15 of November so I can’t answer your question. I really hope it’s new, I contact the seller and he answer all my questions. He have good rep so I went for it. As you said, this is a really good print for that price… my other option (because of my budget) was the Monoprice Select but that cost twice as much as this ZIM. I have Optoprint up and ready and I can’t wait for my printer to arrive.
Buying another one is a good idea but first I need to know if I can use it I am not afraid of hacking but I really hope to have a good experience with my first 3d printer.
Cool, thanks @Cal and @maxx. I’m going to get one (got it! one black one left) and dedicate it to ABS. I’ll try to do my best to outline the steps necessary for taking a brand new Zim from zero to hero.
@maxx beyond all of the hardware mods you’ll need to do to your Zim to make it really function well, you will have to adopt a good slicer as well and stick to just the right settings for your machine. You can use the filament that comes with the machine, but I’d recommend removing the spools and top-feeding the filament directly. There’s really a ton of things you need to do… this thread is a good starting point, but needs to be re-organized. There are a bunch of other hardware modification type threads as well.
1) Yes, that by-passes the A10 board, and you would plug your Pi
into that port. You will still need to disconnect the wires from the
A10 board and power the Pi.
2) My understanding is you don't necessarily need to update the
firmware on the control board. However, if you do, you will have the
source code to make changes as you wish.
3) You should be able to use either/both cartridges for your prints.

Just today I received my replacement USB - B ports, so should have
more information in a day or two.
@jmrobert48 Thank you for your information. Ok so using the usb port will by-pass the A10 board and that’s one of my main concern because if you have to get access to the A10 board to disconnect it, then you have to open all the bottom of the printer, right? I really want to start with my printer but I have to wait for it to arrive
@maxx
You don’t have to remove the bottom if you just want to disconnect the A10 board. There is a plastic piece in the area where the filament cartridges go at the back, that can be removed and gain access to most of the A10 board. However, if you want to place your Pi inside the ZIM, or you need to replace the USB port on the controller board, then yes, you will need to remove the bottom.
Ok. So I’m thinking of buying one of these printers but am completely lost on how to rework the machine. I don’t plan on using the wifi, so is there a way to use this machine with usb normally without messing with the hardware. And at the same time am I stuck with the zeepro slicer or can I use something such as simplify3D. Someone needs to make a video on start to finish on what to do.
Zeepro superglued a plastic piece in the USB B connector of the Zimboard. So to bypass the A10 board, you need to remove that. I got lucky with mine and popped it out without an issue… I think they forgot to glue mine. Others usually wreck their connector trying to remove the plastic piece or the contacts have too much glue on them to provide proper connections, so the USB B connector needs to be replaced. I just bought these for that purpose.
In a perfect world, you wouldn’t have to disassemble your Zim. This is not that world though, and you will want to really get used to taking it apart and learning what makes it tick. When your Zimboard is out, you’ll want to also adjust your stepper motor constant current if you remove your lower drive motors and spool holders.
These are only part of the mods I will be making to my new unit when it arrives, but very important ones.
BDub is right on here! I have done 3 full conversions recently from stock Zim to OctiZIM
My first Zim, the plastic piece popped right out of the port. The other two were COATED in superglue and a major pita to remove. First piece of advice GO SLOW, its not a race and if you go slow you can do this without re-soldering a new usb port/connector.
What ended up working really well for me was to use a small hand drill to get started. Then I used dental picks that I dipped in Acetone to slowly work out the remaining glue and plastic. It’s an exercise in patience.
Finally my printer arrived today so… my USB port is superglue. I manage to remove the plastic cover but not the plastic inside the usb connector, tomorrow I will try to remove it with acetone. Can you please tell me what’s the alternative @waffles ? Thanks.
I used the hand drill to start a little hole that I could get the picks into, then I dipped the dental picks into a little bit of acetone to slowly work the plastic out. Took time but going slow I was able to get all the plastic out.
hi @maxx
From another thread, I was asking to see who would be interested in just a standalone flash update for the zim that would install octoprint.
I went through a few test runs, and it seems doable, but I’m not yet done, maybe by the end of this weekend. I have a friend who just bought one, so i was going to make it for him, but i have a few days before it arrives.
If you’re linux savvy, you can use the existing information that @jpod provided
and
Give me a few and I’ll upload my notes on his scripts, but the information is there.
Basically, the cubie board is roughly equivalent to the raspberry pi mods mentioned on the forum.
So, you set up wifi on your zim, and you connect to it via putty (on windows) or terminal (on mac).
I personally ran through his scripts line by line. Some things were wrong in his script (super minor things, like how to test octoprint was working got me down wrong path), but its more or less correct. The root password is Longgang2014
Sorry if this is sounding scattered, part of the reason i think a new flash is worthwhile. If this sounds tough to you, please hold out a few days, or continue trying to get that USB port clear. I can upload my own notes if you think it would help.
In the meantime, you’re just going to need a phillips screwdriver and a 4GB+ micro SD card ($5-7 on amazon or locally at walmart)
Hi @waffles I am having a hard time with the usb and the super glue plastic so I decided to “bypass” the usb port and connect (soldering) a usb cable from the 4 pins of the board and it didn’t work. I have an error with octoprint to connect to the printer. So now I am on fase 2… I dismantle the whole thing, hehehehe, so now I understand more about the machine and I will change the USB port. I notice that the A10 looks similar, as you said, to the raspberry pi. It comes with a micro SD card so I was thinking in “cloned” it now that you said you can make it work. It will be awesome if you can do it, I don’t know how to program so in that area I’m lost. If you finish the script I will test it. Thanks.
Me and a few others used a tiny mill drill and a Dremel and than carefully milled away the plastic.
It took me just a few minutes. Very easy.
Maybe take a look at another usb port to see where the metal connectors are.
I am so happy because my printer is alive! I followed JPOD guide (https://www.youtube.com/watch?v=oa5vwvJ2eY4) and I calibrated the printer. I didn’t modify the filament part so I will try and test the printer. Thanks to all the people that gave me advise and @waffles I still interested in your mod.