
Looking great! What happened to your “Zeepro” logo? 
Create your own heated printbed!
1 Like
If you have ever seen Arduino board sockets “melting” like mine at my RepRap you will definitely use a relais 
Have you looked at the uniformity across the build plate at all? Are you satisfied with it?
Are you selling the power supply separately? I have a 400W PC power supply already, and I’d like to avoid shipping costs and use the one I have.
I would have thought 120W would be better to pass through the board… (10A)
I bought it used. Somebody hated the company!
I have melted a board before… and I’m realizing I wont be able to buy a replacement board and drop it in. Relay it is!
There is not a lot of uniformity due to the edges but I kinda like it that way. The heat dissapates on the edges while the center maintains temp. I just don’t expect my electricity bill to go down.
What was your strategy for drilling a hole through the pad? Is it safe to drill anywhere?
The Pad that I got came with the hole predrilled. I would think that if you drill in the wrong spot you will cut the wiring inside and it won’t work.
That is what I thought! Some of the cheap thin mats you can see the wire loops so it might not be so bad. I can’t find any with holes though… Any chance you have a link kicking around?
I don’t remember where I got mine sorry.
Anyone recommend using the items below to build a heated printbed? I just purchased my printer and looking to find the easiest way to rig a heated bed without too much trouble… My only concern is addressing how to turning off the heated printbed after the print is completes using the controller below…
http://www.amazon.com/3D-Printer-Aluminum-3-Point-Adjustment/dp/B019BGAB7K/ref=pd_sim_sbs_328_11?ie=UTF8&dpID=31GBiW%2B64hL&dpSrc=sims&preST=AC_UL160_SR160%2C160&refRID=1AC0HV6EY69FSVEQC7E2
http://www.amazon.com/3D-CAM-Anodized-Aluminum-Carriage/dp/B01A974GIU/ref=pd_sim_328_3?ie=UTF8&dpID=4128n768G9L&dpSrc=sims&preST=AC_UL160_SR160%2C160&refRID=0VZ7ZW155BPRFARN00G7
Thanks,
-Brian
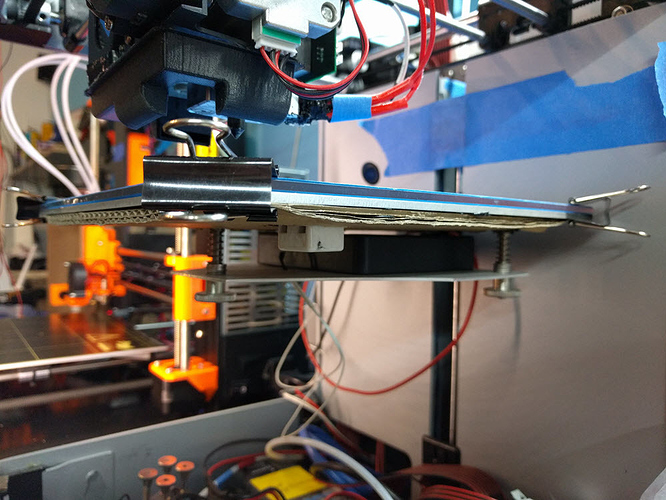
As creating a heated printbed seems to be a big thing for some users and as I’m the creator of this topic (and the wiring diagramm on top) I would like to share my solution which works brilliant so far: several hundred of hours printed so far…
- The wiring is done exaclty as on the diagramm
- sheet metal and mounted it via the 3 holes in the plastic piece of the z axis
- wood thread inserts glued on the printbed (just over the 3 springs) -> use high temperature silicone as a glue!
- the white porclain connector was intended to hold a temperature fuse but never used
- standard MK3 printbed with cupboard isolation underneath
1 Like