OctoPi Tutorial for Zim

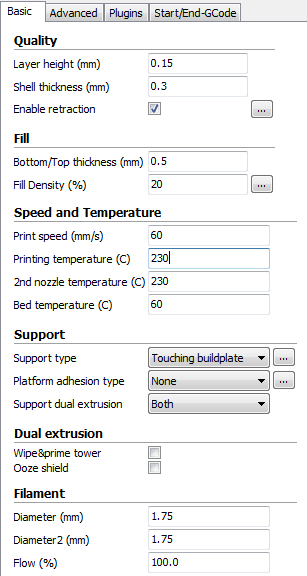
If anybody slices with cura (I do, because i´ts easy to use and available in german language), you will probably have noticed that the temperatures are not set when executing the g-code. This is because by default, the lines for the temperature starts with a semicolon ( ; ) which prevents the line from being executed.
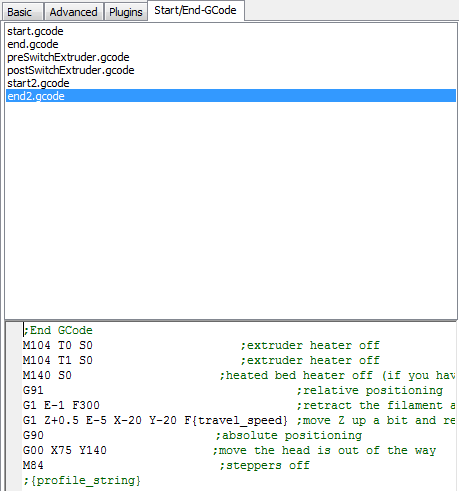
So, if you think about simply removing the semicolon in the Start/End G-Code Tab, you´ll be surprised that heating takes ages… Maybe in other slicers it is the same?

The reason for the long time is that the commands in the g-code heat the Platform and wait for the temperature to be reached. After that, the Extruder heats up… What a waste of time:

M190 S{print_bed_temperature}  ;Set bed temperature and wait
M109 S{print_temperature}      ;Set extruder temperature and wait

So,
if you want to accelerate this process you can set the G-commands in a way that all heaters start at the same time and the print starts after the last has reached it´s target temperature:

;Set hotends and bed to their temps and continue
M140 S{print_bed_temperature}  ;set bed temperature, no wait
M104 T0 S{print_temperature}   ;set EX0 temperature, no wait
M104 T1 S{print_temperature2}  ;set EX1 temperature, no wait
;set temps again and wait
M190 S{print_bed_temperature}  ;set bed temp and wait
M109 T0 S{print_temperature}   ;set EX0 temp and wait
M109 T1 S{print_temperature2}  ;set EX1 temp and wait

This code sets all temperatures first with M140 and M104 and continues immediately, regardless if the temperature is reached or not. Since you want to have each temperature reached, the same temperatures are set once again, this time with the wait-command (M190 and M109). Saves me about 10 Minutes of waiting per print and I don´t have to tinker around with the manual temperature settings in Octo-Print.

Great tip! Remember that if you set a temperature high enough that it takes longer than 5 mins to reach temperature with M109, you should send an M84 S0 just before it, or extend it with M84 S[n seconds]. Zim Marlin has a “stepper inactivity” check that defaults to 5 mins. If the timer is reached with no activity, the temperature drops to 0 and the head is homed. If you ever see it magically ignore the rest of your gcode and drop the temperature back to zero and home the head, it is a good bet that you need to disable or extend the inactivity timer :smile:

Is there any way to increase this time?
I usually heat up everything I need, do something other meanwhile and sometimes I miss this 5 minutes and my ZIM homes in XY and shuts off the temperature - I just want to increase this time to e.g. 10 minutes or so.
( one way would be to add a custom button where I can disable this with M84 S0 :confused: )

So if you want to set another time than specified in the firmware, you could add the M84 S600 (for 10 Minutes) -command at the beginning of the G-code.
–> Or you could add the line into the startup-script in octoprint (or maybe the script when connecting to the printer). You wouldn´t have to manipulate the firmware but you would get the result that you want.

1 Like

oh nice,

I have been having the problem with my printer pausing during a print. It was particularly bad when printing a complicated large part recently. It happened on a terrible spot on my print as well making it both hard to remove some support and messed up one of the faces on my print.

Thanks for posting your updated Marlin software. I’ll give this a try and see if it fixes my my issue. My other thought is swapping out my sd card on the pi for a slightly faster one with regards to small file r/w speeds.

I need to mess with M84 S0 to fix the inactivity problem too and work with adjusting my fan speeds.

This forum has helped so much.

I like Jürgen’s solution better than my original. Instead of S0 (disabling the timeout) set it to something larger, like S600 for 10 mins. This still provides inactivity protection.

For the pausing, more research led me to believe the number of short moves can contribute to the issue. If the alternate firmware with additional buffers doesn’t help, you might try reducing the polygon count of the model.

Here we go with another issue you might be facing when using Octo…
Most of us would have watched the video “OctoPi Custom Controls for Zeepro Zim” and follwed the steps for the load and unload scripts…
I wondered all the time that some of my prints fail due to massive over-extrusion in the first layer and couldn´t find any mistake in the configuration or the g-code.
Well, the mistake is a very simple one (sorry jpod…):
If you use exactly the scrips provided in the video, you´ll set the extruder to relative mode with M83, which is absolutely the right chioce to extrude a specified amount of filament in this case. BUT: The script doesn´t set it back to absolute mode at the end.
G-Codes on the other hand in most cases work with abolute commands and (hell knows why) don´t have the appropriate commands for initialisation at the beginning. People who work with CNC Machines know that at the beginning of a G-Code there HAVE to be all commands to initialize the machine: Set absolute mode, set Units, set plane, set home and so on. I really don´t know why those slicers don´t.

Solution: Extremely simple: simply add a M82 at the End of the script to set the extruder back to absolute.
Better: Tell your slicer to write the necessary commands at the beginning of the g-code or
EVENBETTER:
Go to the settings of octoprint, into G-Code scripts, an add all commands into the field “before print started” that possibly could have changed to give a controlled condition and a “clean start”. Recommendation:

G17  ;set plane to XY
G21  ;set units to mm (or G20 for inches)
G90  ;set to absolute positioning (or G91 for incremental/relative)
M82  ;set extruder to absolute mode (or M83 for relative)
M107 ;fan off
M203 X6000 Y6000 Z300 E250 ;set max feedrates (testing of the values needed!)

Btw: On the other hand, this means that every setting you want has to be defined in the g-code. You can´t have everything.

1 Like

Good point! Some slicers allow either relative or absolute extrusion. The original Zim slicer used relative extrusion. I setup my Simplify3d profiles to use relative extrusion also (there’s a checkbox), so there was no need to set it back. I should have pointed this out. :slight_smile:

The other thing missing in the tutorial I discovered afterwards is the M84 S600 to extended out the 5 min inactivity timer while heating. For those using the tutorial info, please update your scripts by adding this before the M109 or you may see spurious head homing/temperature zeroing behavior during extruder heating phase.

after reading this i think this may be part of my problem. it just drops temp out of nowhere. im no expert like you guys so take it easy on me. i really need some instruction on how to fix this. i dont know exactly how to add in the m84 line of code. and on a side note along with dropping temp before and during a print the actual print itself looks like its not extruding enough material. any kind of help would be much appreciated guys.

@Kr3 In octoprint settings->GCODE scripts->After connection to printer is established add the line “M84 S600” as the last line and you should be good to go. For not extruding enough material, make sure you set the correct extruder mode (absolute or relative) and use M83 (for relative) or M82 (for absolute) before a print.

So we have recommended scripts for Octoprint:

When conncting to the Printer:

M1202 ; LED lights on
M84 S600 ; set inactivity timer to 600 seconds

When a Programm is started:

G17  ;set plane to XY (not really necessary...)
G21  ;set units to mm (or G20 for inches)
G90  ;set to absolute positioning (or G91 for incremental/relative)
M82  ;set extruder to absolute mode (or M83 for relative)
M107 ;fan off
M203 X10000 Y10000 Z600 E250 ;set max feedrates
G28 ;home all Axes

When a G-code is aborted:

M104 S0 T0 ; set temperature of EX0 to 0, no wait
M104 S0 T1 ; set temperature of EX1 to 0, no wait
M140 S0 ; set heated bed temperature to 0, no wait
G0 Z150 F600 ; lower the platform completely (could be Z140, depending on thickness of your Platform)
G84 ;turn off stepper drives

…And in the Beginning of a G-Code Program:

;Set hotends and bed to their temperatures and continue
M140 S{print_bed_temperature}  ;set bed temperature, no wait
M104 T0 S{print_temperature}   ;set EX0 temperature, no wait
M104 T1 S{print_temperature2}  ;set EX1 temperature, no wait
;set temps again and wait
M190 S{print_bed_temperature}  ;set bed temp and wait
M109 T0 S{print_temperature}   ;set EX0 temp and wait
M109 T1 S{print_temperature2}  ;set EX1 temp and wait

–>The commands {print_temperature}, {…} work with cura slicer. Other slicers may have other parameters.

Please correct me if I made a mistake

1 Like

Hey looks great Jürgen, thanks for consolidating this. Do you know of a quick tutorial on setting up the Octoprint Cura for onboard slicing?

@jpod do you think you could share your simplify3d profile? Trying it out for the first time and want to see what others have been using for the Zim

Sure thing, I’ll stick it somewhere accessible this evening.

still does the same thing after the codes, just crashes right before a print.

@jpod
Sure, that´s pretty easy!
Most of the steps are only necessary once, so don´t be alarmed of so many steps.
Just download Cura (15.02.1) and install on your PC.

1: in Cura Add a machine using the following settings:

  • Kind of machine: Other -->Next
  • Other machine information: Custom -->Next
  • machine name: ZIM
    -with, depth, height: 150/150/150, Nozzle:0.35

Then click Machine --> Machine settings… and check the following:

Step 2:
Click Expert --> switch to full settings (but you can also continue with the quickprint if you´re not familiar with the advanced settings)

Step 3:
Go through all the tabs and check every setting. Most of them are set very good by default.


Note that the scripts “start2.gcode” and “end2.gcode” are only available if you have a second extruder.

Step 4:
Click File --> save Profile and save the settings profile to your Harddisk
You can make as many profiles as you want, so it is good to make profiles for PLA and ABS, as well as for different qualities

Step 5:
Go to octoprint settings --> Plugin manager … and install the plugin “cura engine” --> after that, reboot your Pi

Step 6:
Go ot Octoprint settings --> Cura Engine --> Import Profile.
open the Profile that you saved in Cura and… thats all.
Octoprint will now use the settings for slicing.

@Kr3 Sure looks like the inactivity timer. You can watch the terminal and see if you see any new M84 commands after your M84 S600.

@J_Schmidt Hey thanks!

@jpod I can probably figure put the timeout issue. I’ll try to set it to 6000 lol. And I will try to follow those new cura settings because that’s probably the reason it’s not extruding right. All of the codes seem to be working just fine so I have no idea why it’s still timing out. It just stops heating all together about at the 3 or 4 layer mark but keeps following the tool path, I stop the print when the temp gets Down to 170.

It went from temp dropping after 4 layers while printing very very very thin to printing way too much and stopping at the certain points that are globbed up. And yes the globbed up print is after the new cura settings thats copied exactly like above. So it’s a feed rate issue right? It was extruding so fast the gear was “clicking” on the filament itself.

Jep, that looks really strange. The right print looks exactly like my absolute/relative extrusion issue. But that is no explanation for your temerature problems. Could you post your g-code, please? I would take a look at it regarding your feed problems.
@jpod: Do you have an idea for his temperature-drops?

EDIT:
Right now I realized something strange on the pic you posted. Your temperature-graph starts to go up when your Code set the M109 command. Then the graph stays at about 60°C, and pops up two minutes later? Could it be a communication problem?
Obviously the temperature of your hotend does not really stay at 60°C and heats up in a second to 140°C. So Octoprint seems to have had no temperature information in the meantime. Maybe Octoprint stopped the print due to lack of information?